 with PREFALZ in P.10 dark grey")


If an overlap rib or centre rib of the roof tile is lying directly above the rafter (in the hanger bolt installation area), the Sunny special solar bracket can be used instead of installing a base plate.
accessories required: Special adhesive kit
Note
The PREVARIO Sunny special may only be used in combination with the Sunny solar bracket. A combination with the PREVARIO 3.S is not possible due to the different installation heights.


adjustment range |
22 mm |
|---|---|
fasteners |
PREVARIO Sunny 250 – single-skin roof structure PREVARIO Sunny 350 – double-skin roof structure |
colour |
powder-coated in anthracite (storm washer and Sunny) |
components |
3 flange nuts M12, stainless steel (SW 18) |
Accessories required |
Special adhesive kit |
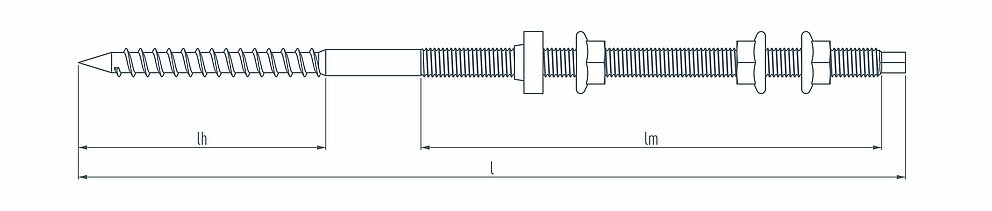
Dimensions of hanger bolt
DIMENSIONS |
l |
lh |
lm |
SW |
M12 × 250 |
250 |
100 |
100 |
SW 9 |
M12 × 350 |
350 |
100 |
195 |
SW 9 |
Requirements of the sub-structure framework:
The counter batten may function as a supporting structure if the aforementioned points are observed and the strength of the solar bracket can be transferred to the rafters via it. Dimension the roof structure to accommodate the loads acting on it in accordance with the applicable standards.
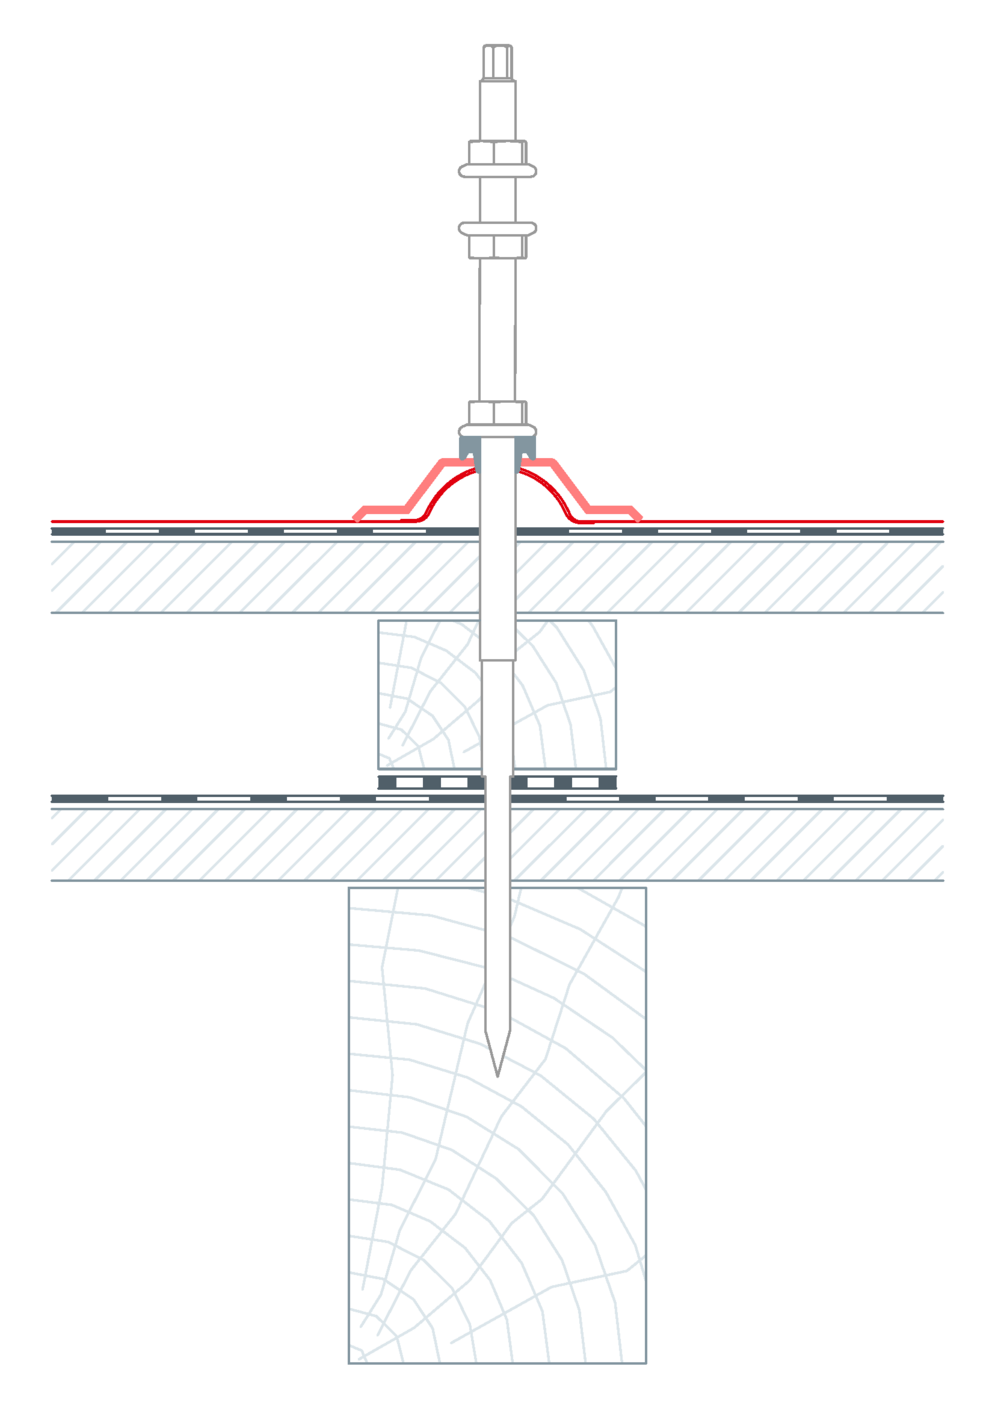
Roughen and clean the bonding surface on the Sunny special solar bracket and the roof tile. Apply special adhesive to the roughened and cleaned Sunny special solar bracket. Push the Sunny special into the top seam of the roof tile in the area of the overlap rib or centre rib, and fold downwards. Push the Sunny special as far as possible up into the seam.


Mark the position of the hanger bolt. Pre-drill the timber structure with ⌀ 8 mm. Drill out the Sunny special and roof plates with ⌀ 13 mm. Screw in the hanger bolt with a drill (wrench socket 9 mm). Penetration depth in the supporting substrate (rafter): min. 80 mm


Tighten the nut until the EPDM seal bulges outwards (open-end wrench: 18 mm). Install the second nut and turn it all the way down. Measure 60 mm up from the top edge of the second nut (bearing surface for the rail holder), and cut the hanger bolt off. Place rail holders and tighten them at the appropriate height (corresponding to the rest of the solar brackets) with two fork wrenches (open end spanner: SW 18).


You can only download content from one product category. If you require content from multiple categories, please create a separate download for each product area.
