 with PREFALZ in P.10 dark grey")


Easy to install and a save grip on roof tiles, R.16 roof tiles, DS.19 shingles, rhomboid roof tiles 29×29, rhomboid roof tiles 44×44 and FX.12 roof panels. Full formwork must be mounted in the area in which you intend to install the PREVARIO 3.S.
Note
During installation, observe PREFA’s installation instructions and the current professional standards and safety regulations.
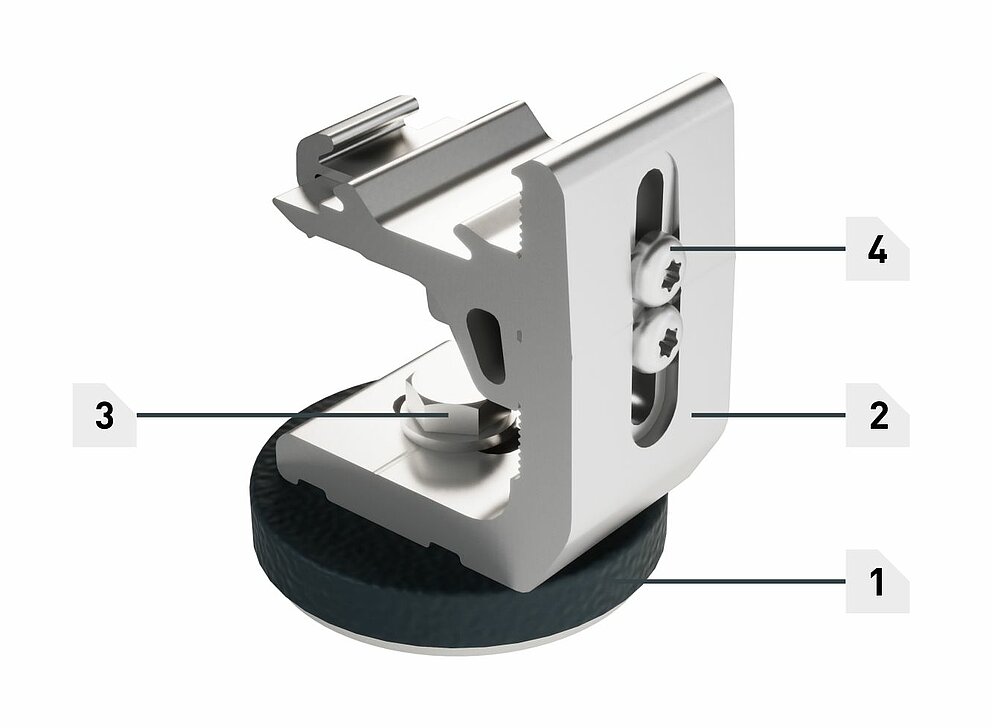
1 Foot part with cover cap
2 Base body
3 M12 hexagon head screw (SW 19)
4 M8 fixing screws (T40)
PREVARIO 3.S (attached to rafters)
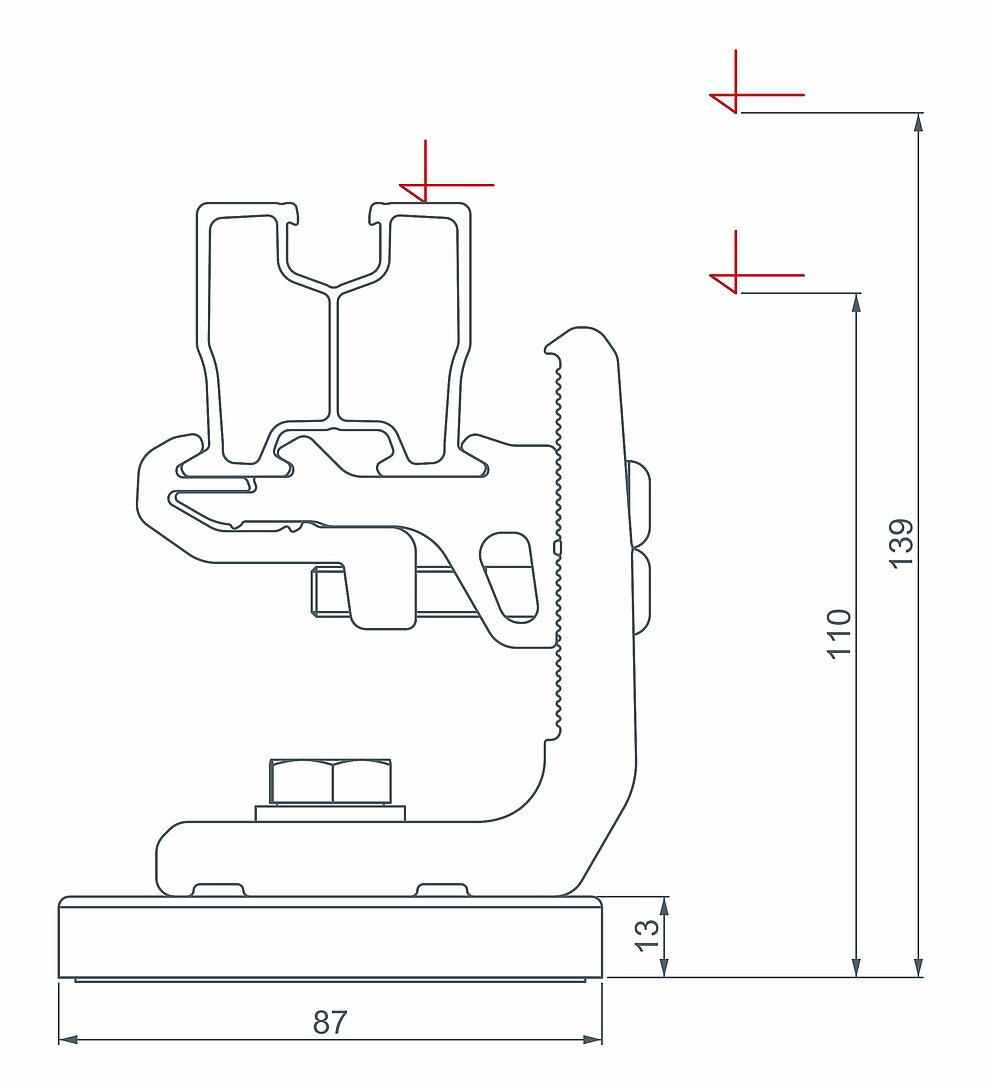
adjustment range |
29 mm |
|---|---|
fasteners |
PREVARIO 3.S 120 – single-skin roof structure PREVARIO 3.S 220 – double-skin roof structure |
colour |
uncoated (base body) |
components |
Foot part (EN AW 2007) with sealing |
PREVARIO 3.S (mounted on formwork)
adjustment range |
29 mm |
|---|---|
fasteners |
6 countersunk drilling screws Ø 6 × 38/25 mm, stainless steel (T25) |
colour |
uncoated (base body) |
components |
Foot part (EN AW 2007) with sealing |
Requirements of the sub-structure framework:
The counter batten may function as a supporting structure if the aforementioned points are observed and the forces of the solar bracket can be transferred to the supporting structure via it. Dimension the roof structure to accommodate the loads acting on it in accordance with the applicable standards.
Requirements of the sub-structure framework:
(the sheathing board must extend across at least three rafters, at least 2 fastening points per rafter support)
Dimension the roof structure to accommodate the loads acting on it in accordance with the applicable standards.

Mark the centre of the rafter. The foot part must be positioned with a minimum spacing of 10 mm to the fold above and 80 mm to the fold below (see sketches above).
To install the bracket on the rafter, the drill holes (⌀ 8.5 mm) must be positioned along the rafter (fixing screws in one axis with the rafter). Remove the protective film from the bracket, position and glue in place.
Note
The mount should not be attached on a seam or crest of the PREFA roof covering. If the position of the rafter does not coincide with the installation area, a base plate must be used.


Pre-drill the screw hole in the sub-structure framework with a drill (⌀ 5.0 mm).
Drilling depth: approx. 50 mm
Attach each foot part to the rafter with two fixing screws ⌀ 8×220 mm (double-skin roof structure) or ⌀ 8×120 mm (single-skin structure) until the surface seal is pressed onto the roof covering and sub-structure framework. When mounted correctly, the surface seal should bulge slightly outwards (Torx bit: T40).


Attach each foot part to the rafter with six fixing screws ⌀ 6.0×40/24 mm until the surface seal is pressed onto the roof covering and sub-structure framework. When mounted correctly, the surface seal should bulge slightly outwards (Torx bit: T25).
Note
Mount maximum one PREVARIO 3.S in the rafter area on the formwork (formwork thickness: min. 24 mm; timber grade C24). The sheathing board must extend across at least three rafters and be attached with ring shank nails or screws. Dimension the roof structure to accommodate the loads acting on it in accordance with the applicable standards.

Attach the cover cap, place the base body onto the foot part, and then fasten with the hexagon head screw (open-end wrench: SW 18). The PREVARIO 3.S is suitable for mounting on PREFA small-format coverings.


With small-format PREFA roof elements, it might be necessary to install a base plate in order to mount the PREVARIO 3.S, e.g. if a fold is directly placed over a rafter in the installation area.


You can only download content from one product category. If you require content from multiple categories, please create a separate download for each product area.
