Installation guidelines
Please select one or more chapters to download.
Table of contents

Installation

  • The first DS.19 shingle is to be fixed with a nail to the left of the sloping fold in each row in order to prevent it from being shifted sideways (Image 1).
  • Adjust DS.19 shingle and push into the folds (Fig. 2).
  • Fasten the DS.19 shingle to the punched-out notch marked with an “H” using a patent clip and a supplied 2.8/25 grooved nail (see figure in the chapter Installation direction and fastening).
  • No fasteners may be placed on the rebates that run diagonally downwards (danger of capillary action).
  • The marking on the lower shingle fold indicates the position of the fold of the following DS.19 shingle that runs diagonally downwards (Fig. 3).
  • The two markings on the sloping fold of the DS.19 shingle mark the lower or upper end of the bead at the top of the shingle fold of the DS.19 shingle underneath (Fig. 3).
  • Carefully follow all markings.
  • The exact design is clearly visible on the aligned snow guards.

Note

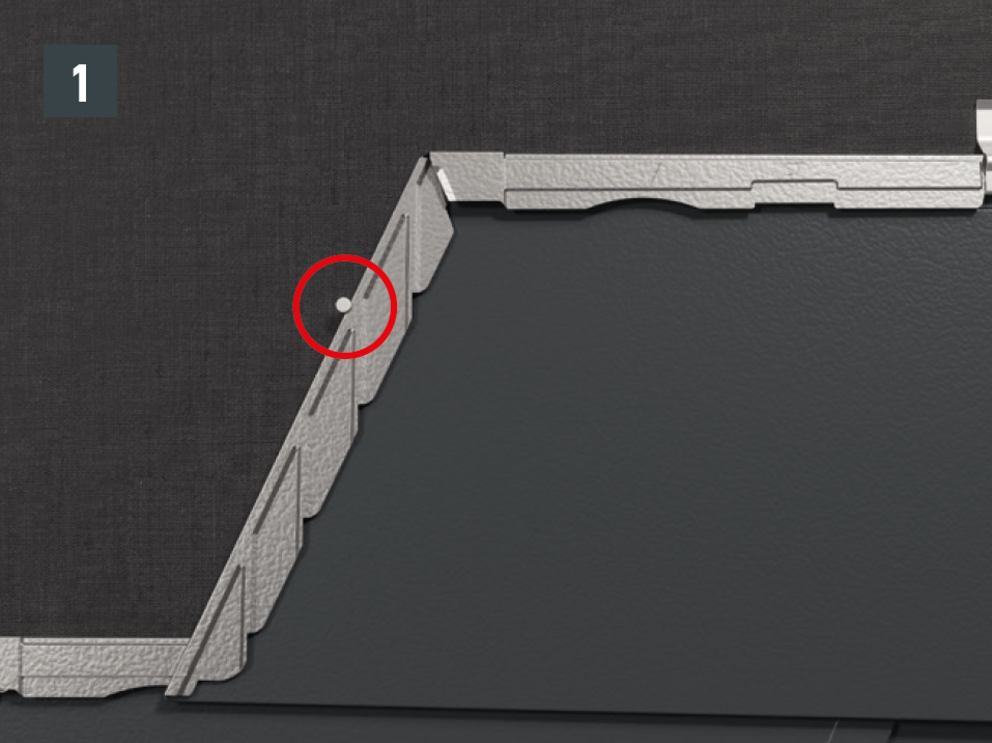
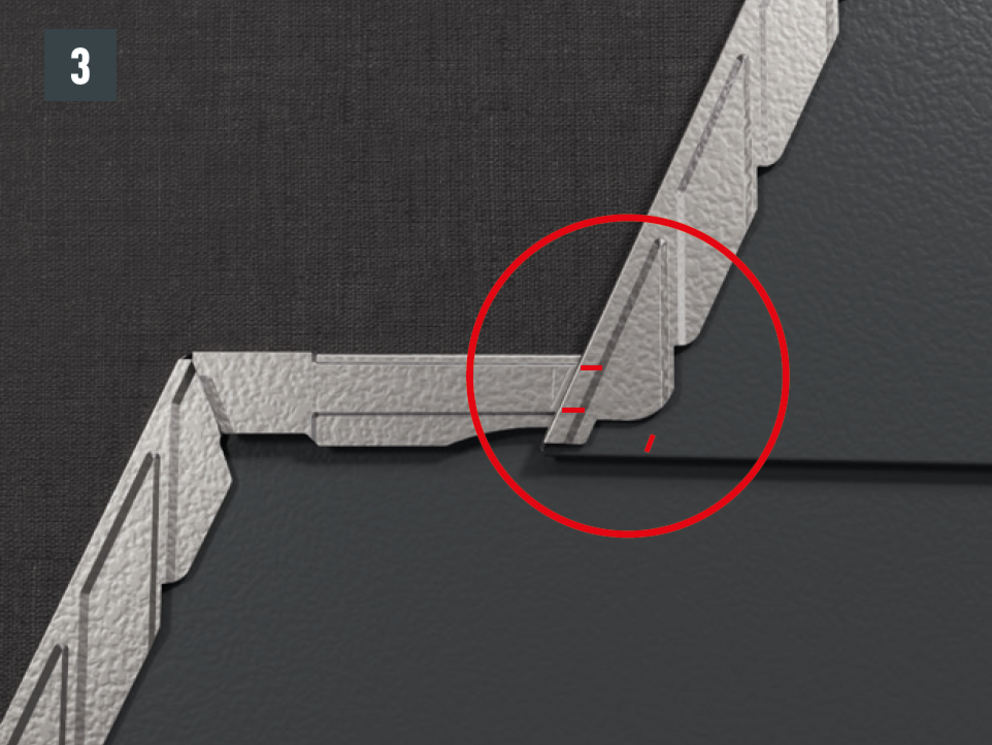
Due to the shape of the DS.19 shingle, there is a lowering at the heel of the DS. 19 shingle. Keep to this lowering when laying the first DS.19 shingle in each row by not pushing the first DS.19 shingel all the way to the top in the starter strip or fold. Leave the heel of the first DS.19 shingle until the upper shingle fold runs straight through over the entire length.
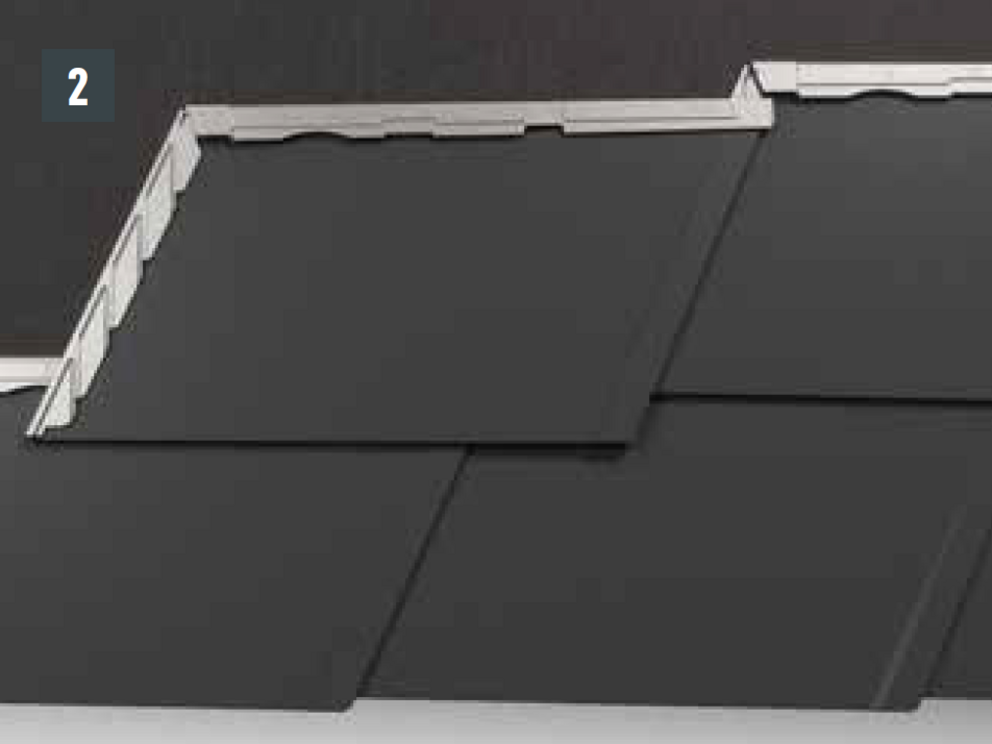
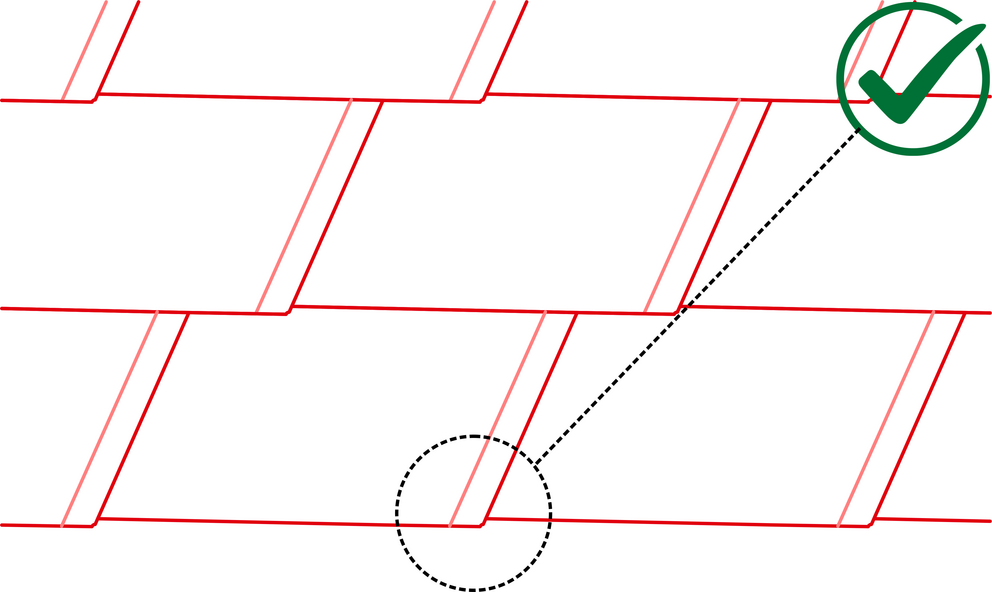
Avoid covering the first DS.19 shingle Make sure that when connecting to the collar, the upper shingle cover runs straight through over the entire length.