 with PREFALZ in P.10 dark grey")


Processing information
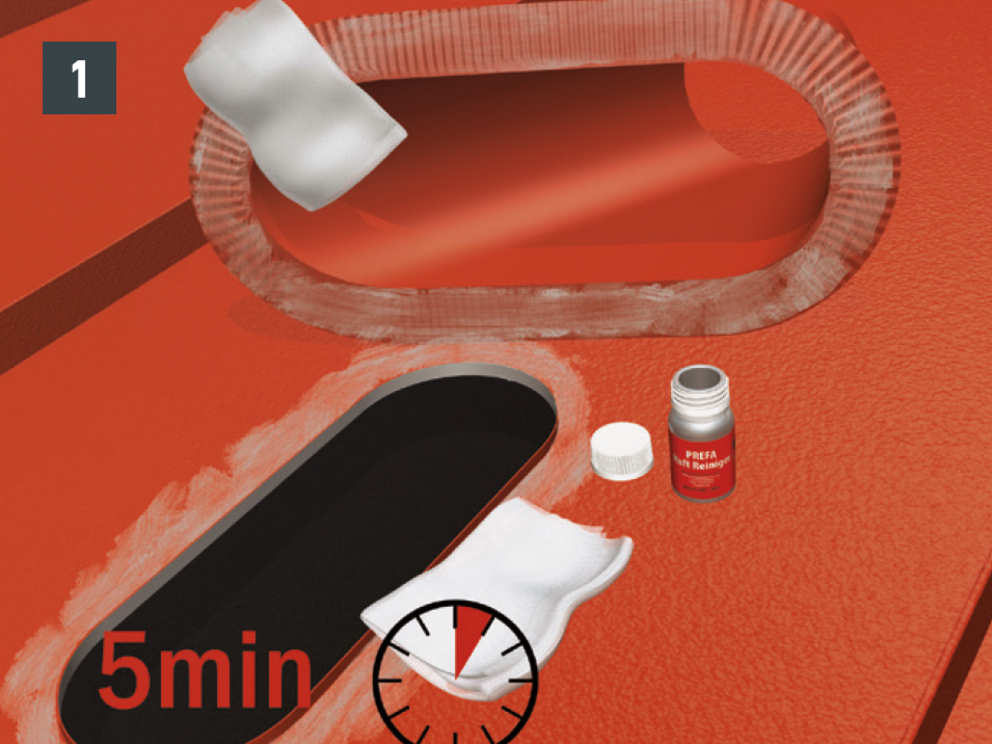
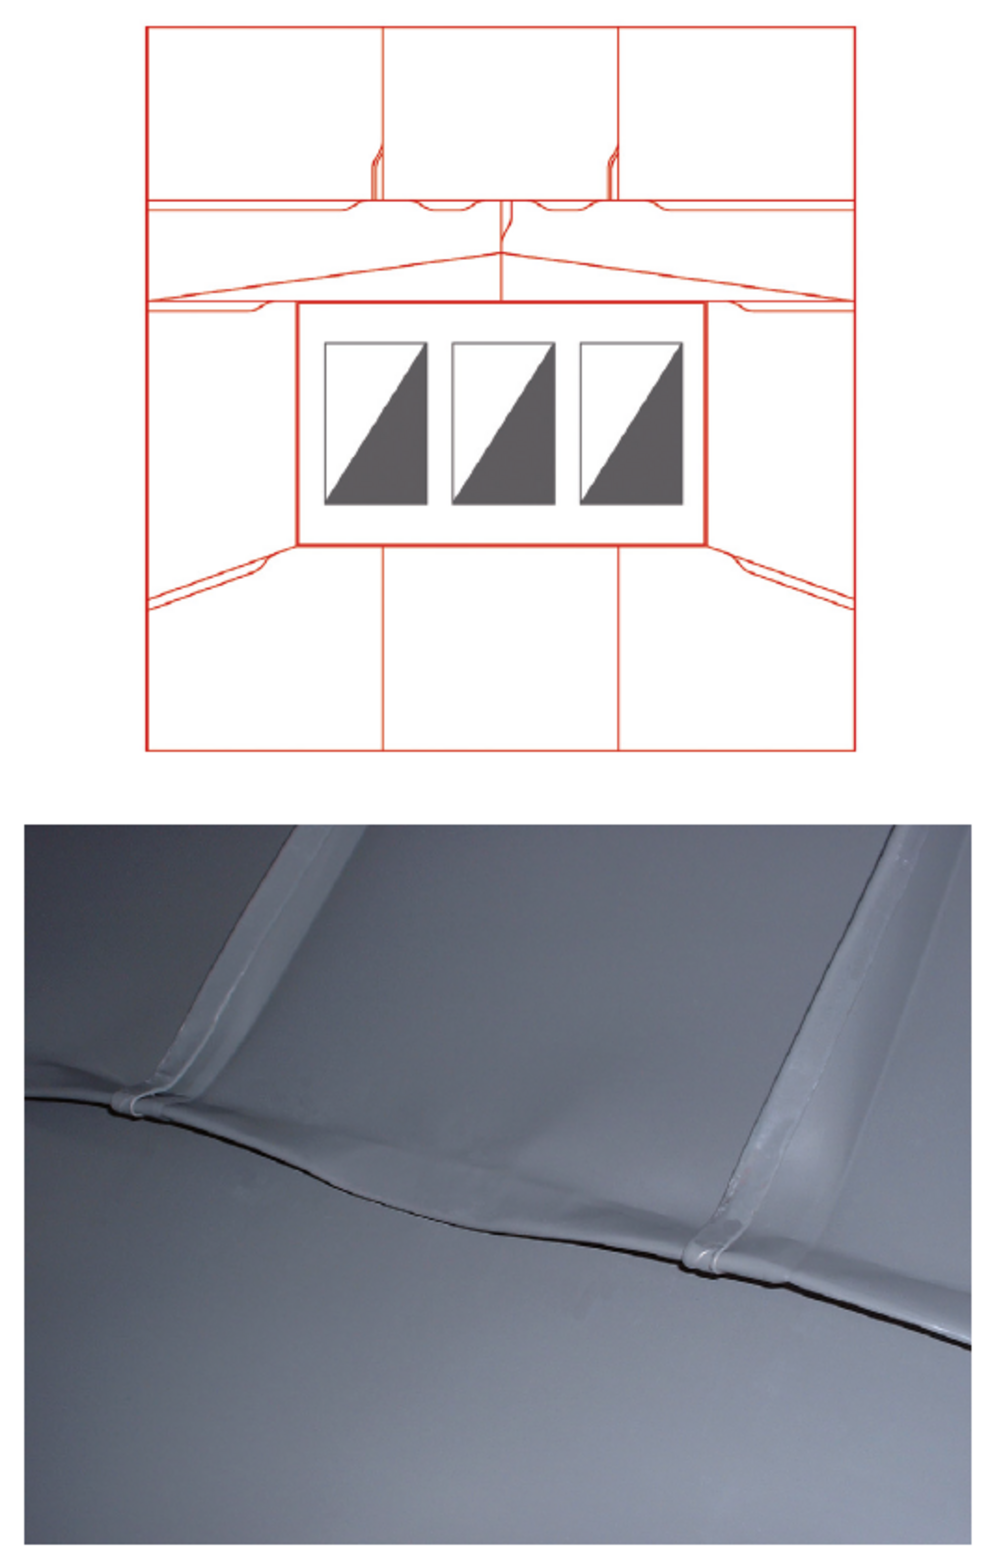
PREPARING THE ADHESIVE SURFACES (Fig. 1)
INSTALLING THE BONDED VENT PIPE COVER
Position the bonded vent pipe cover:
Position the PREFA adhesive pipe cover over the pipe lead-through and mark the oval, inner and outer adhesive flange on the PREFALZ sheet.
Create the cut-out:
Cut the PREFALZ sheet approx. 10 mm smaller than marked.
Additionally, widen (sweep) the opening approx. 10 mm upwards.
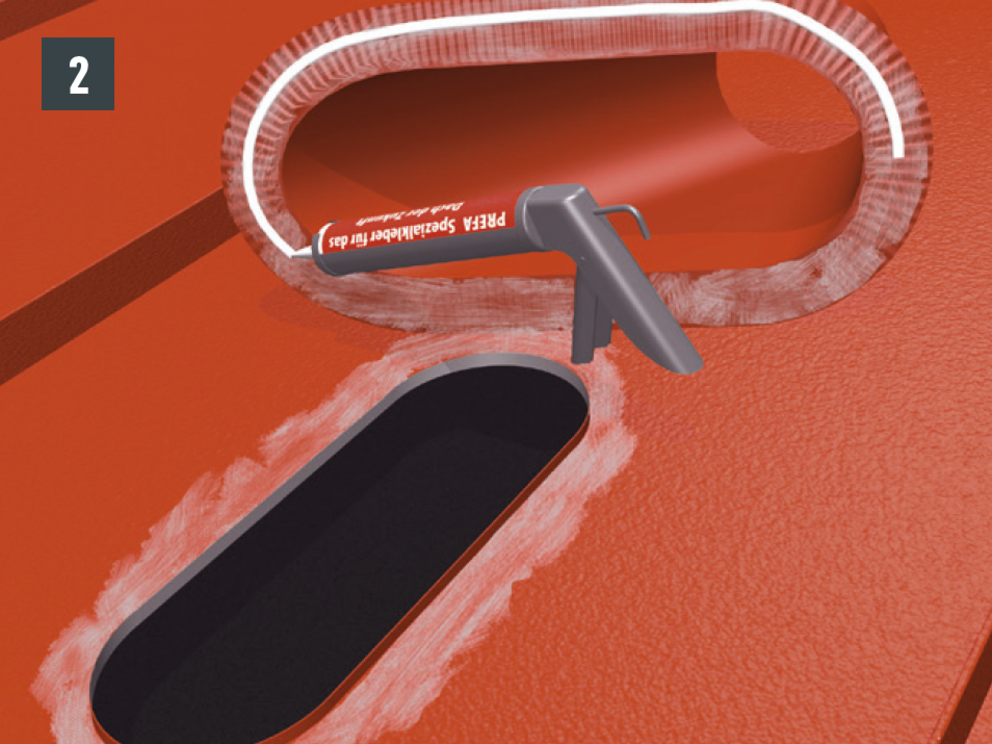
Apply adhesive:
Apply the special adhesive centrally and evenly to the flange.
The bead of adhesive should have a thickness of approx. 10–12 mm.
1 cartridge is sufficient for about 4 covers (Fig. 2).
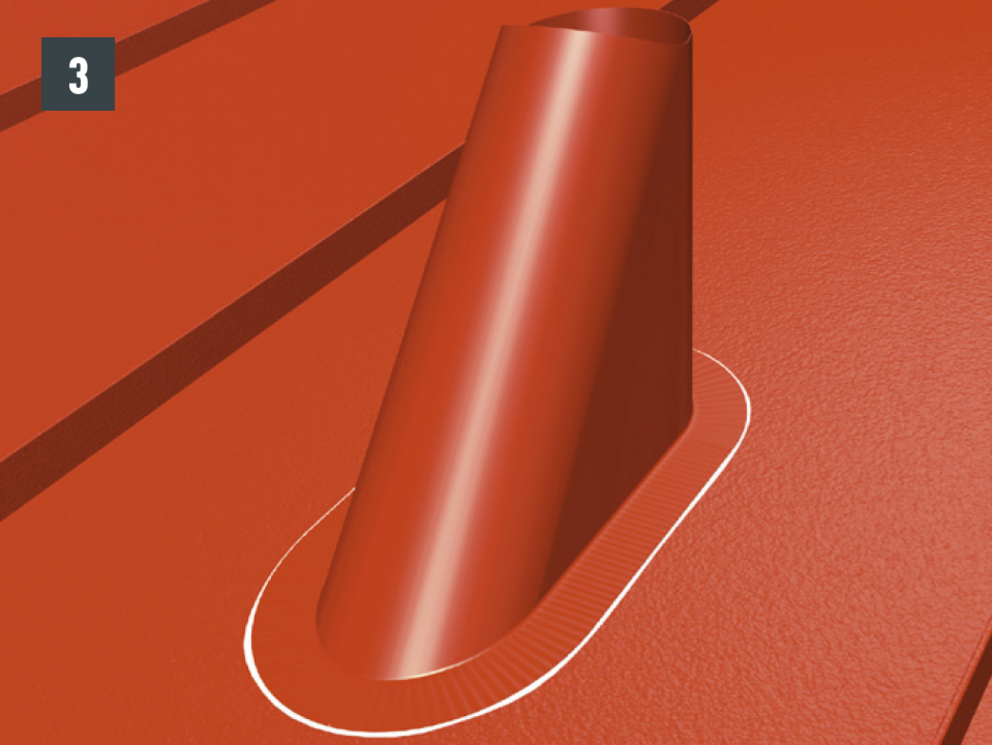
Install the bonded vent pipe cover:
Press the cover so that adhesive escapes at the sides (Fig. 3).
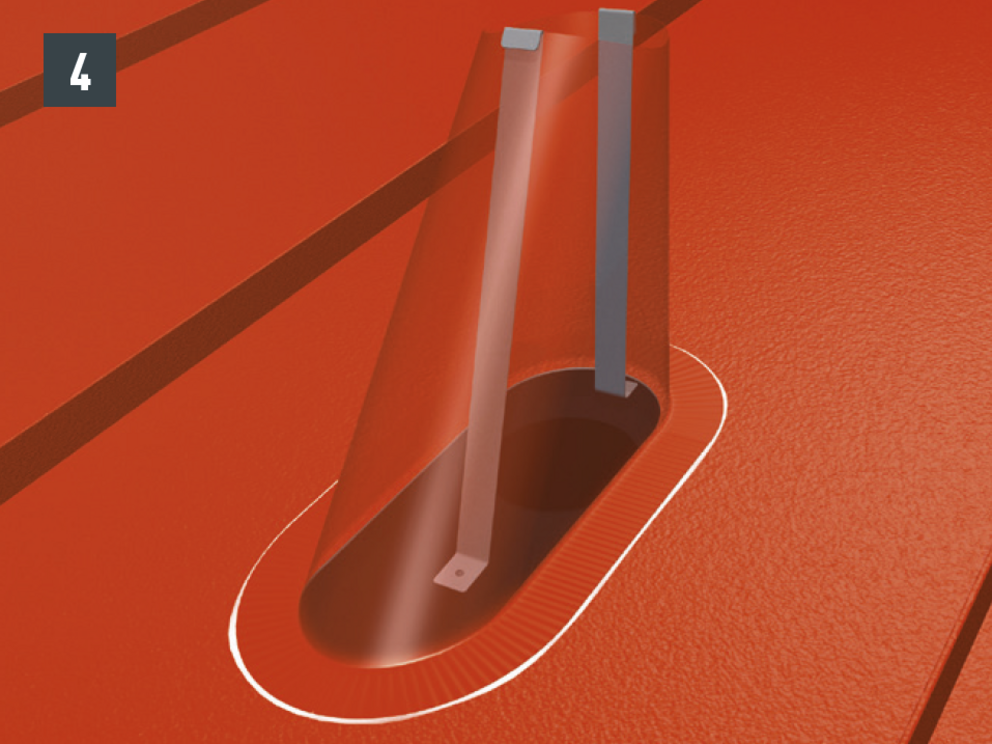
Fixing during curing:
During the drying phase, the bonded vent pipe cover must be secured against slipping.
Full strength is only achieved after several days depending on temperature and humidity.
Fixing with aluminium strips:
Use an aluminium strip with a width of at least 30 mm for fixing.
This is to be bent sufficiently over the top edge of the bonded vent pipe cover and screwed to the formwork (Fig. 4).
Note
Do not install the pipe cover close to the standing seam. Protect the pipe penetrations against strong mechanical stress (e.g. snow pressure).
Marking and adapting the bonded vent pipe cover:
Mark the required pipe size on the bonded vent pipe cover and cut the cover accordingly.
Preparing and installing the ventilation pipe:
Slide the supplied EPDM seal and the cover rosette onto the pipe.
Then install the ventilation pipe.
Fit the seal:
Pull the EPDM seal down over the bonded vent pipe cover so that the transition between the pipe and the cover is securely sealed.
Attach the cover rosette:
Slide the cover rosette over the EPDM seal and fix it onto the pipe.

Note
Bonding metals offers, among other things, the advantage that no high temperatures are required. This keeps the microstructure of the aluminium unchanged, which in turn preserves the hardness and strength of the material.
The strength of an adhesive connecting depends on several factors:
With the handy PREFA special adhesive kit, bonded vent pipe covers and joints on over-rafter and half-round gutters can be produced permanently and reliably. A significant advantage lies in subsequent installation, which is quick, uncomplicated and possible without seaming.
Important processing information:
The bonding surfaces must be roughened (e.g. with sandpaper) and then thoroughly cleaned with PREFA adhesive cleaner. The surfaces must be dry, clean and free of grease.
During the curing phase, ensure that the parts to be bonded are firmly fixed to prevent slipping.
You can only download content from one product category. If you require content from multiple categories, please create a separate download for each product area.
