 with PREFALZ in P.10 dark grey")


Click on the topic you want to go directly to the appropriate guide:
When planning on-roof, care must be taken to ensure that these are installed at the level of the roof covering above the sub-roof/underlay running underneath or above the ventilation level.
The starter flashings are designed and executed to be cut to 500 mm in sections up to 3 m in length, up to a cut of 800 mm in sections up to 1 m in length. The regulations for seam roofing apply to dimensions wider than 800 mm.
The edge plate must be at least 15 cm behind the overlying area of the edge gutter and should have a cut of at least 400 mm.
Below a roof pitch of 25°, roof edge plates must have a rear edge of at least 15 mm.

Minimum roof pitch and slope
The PREFA on-roof gutter is generally designed for a minimum slope of 3 mm/m. In certain circumstances however, the PREFA on-roof gutter can also be designed without a slope.
Note
In the case of a reduced slope, increased cleaning or maintenance is to be expected.
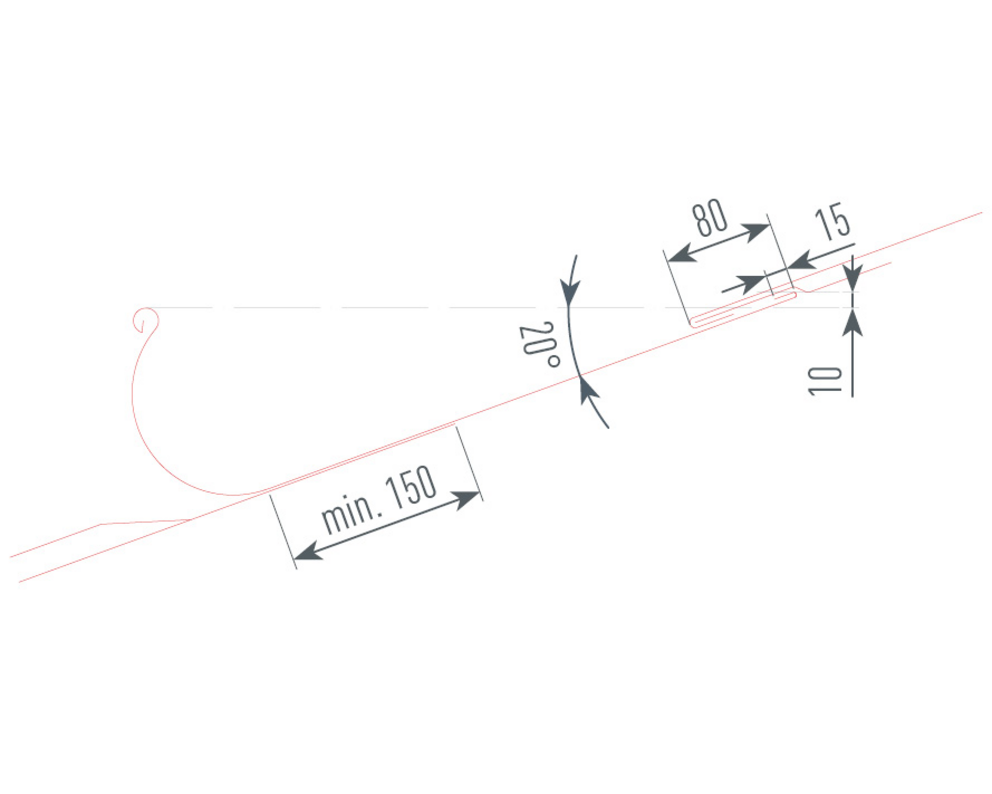
It is important to ensure that the roof gutter rear edge is 10 mm higher than the front of the edge gutter. This results in a minimum roof pitch of 20° for PREFA on-roof gutters (see figure below).


Note
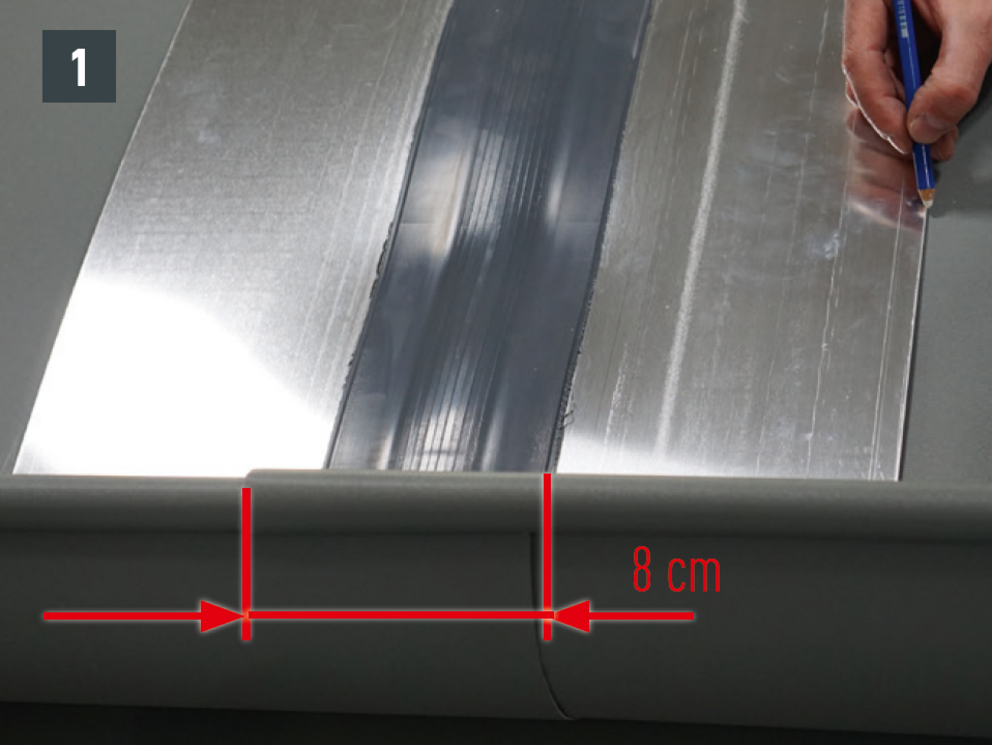
Flatten the seams that the on-roof gutter overlaps 150 mm minimum. Mind fall


Attention
It is important to ensure that the roof gutter rear edge is 10 mm higher than the front of the edge gutter.
Product |
Joints |
On-roof gutter |
approx. 5 |
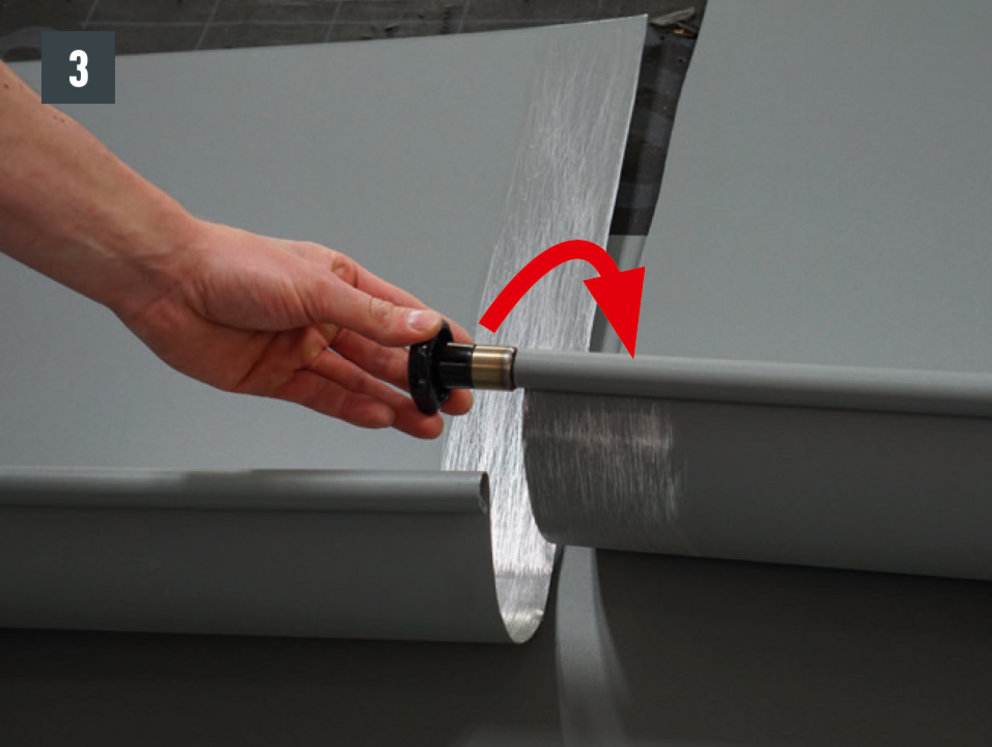
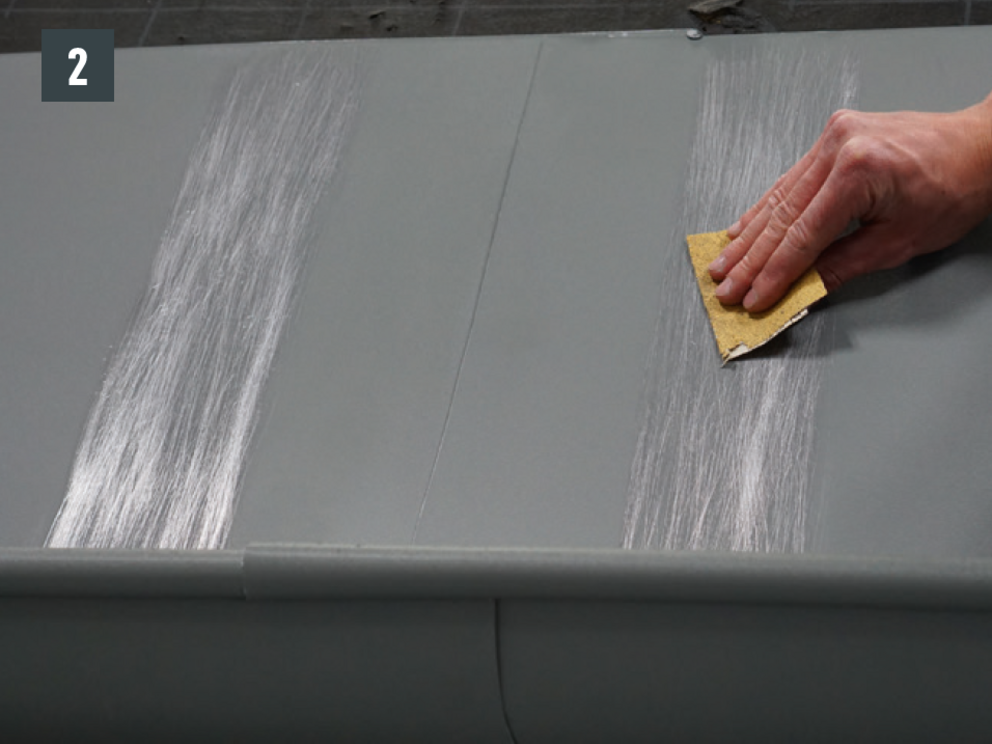
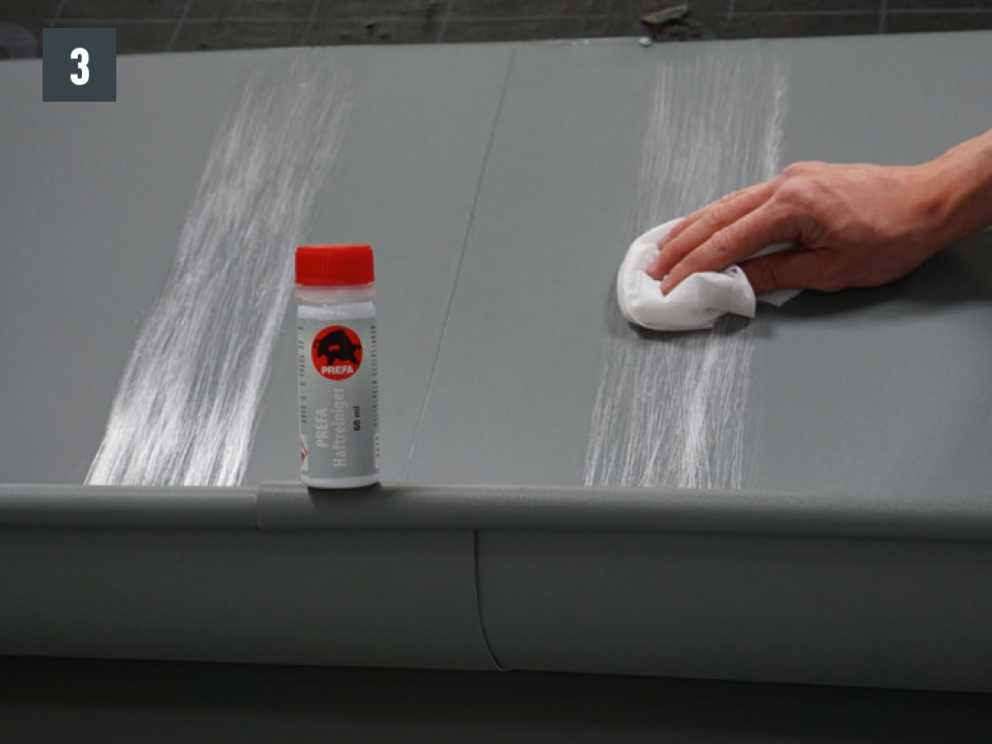
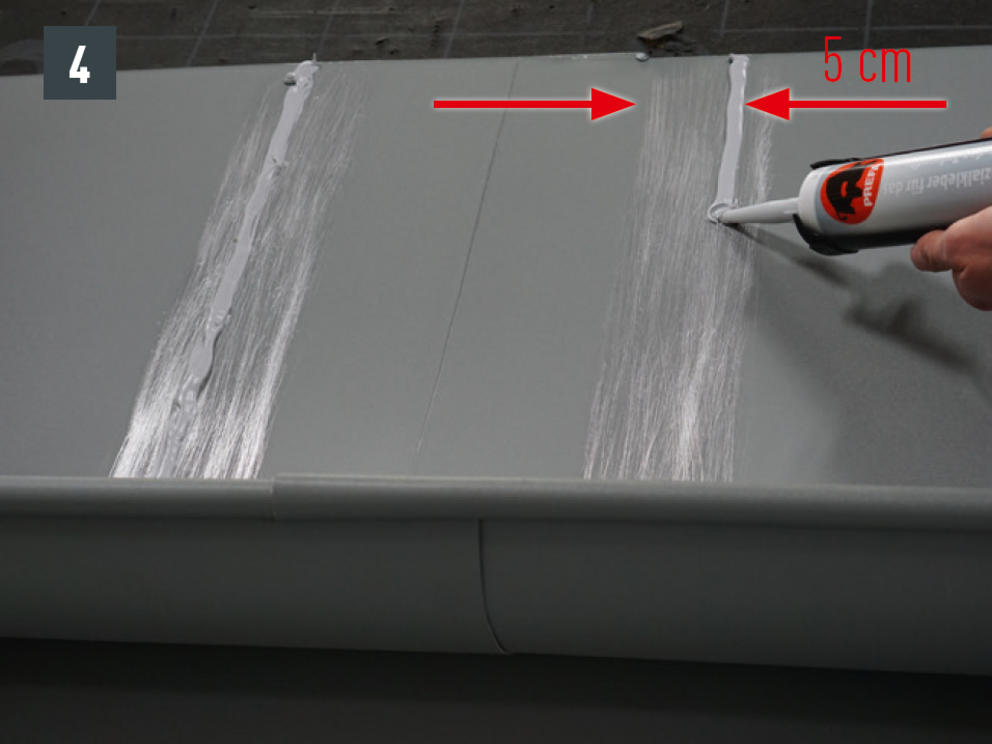
On-roof joint with 1 special adhesive cartridge
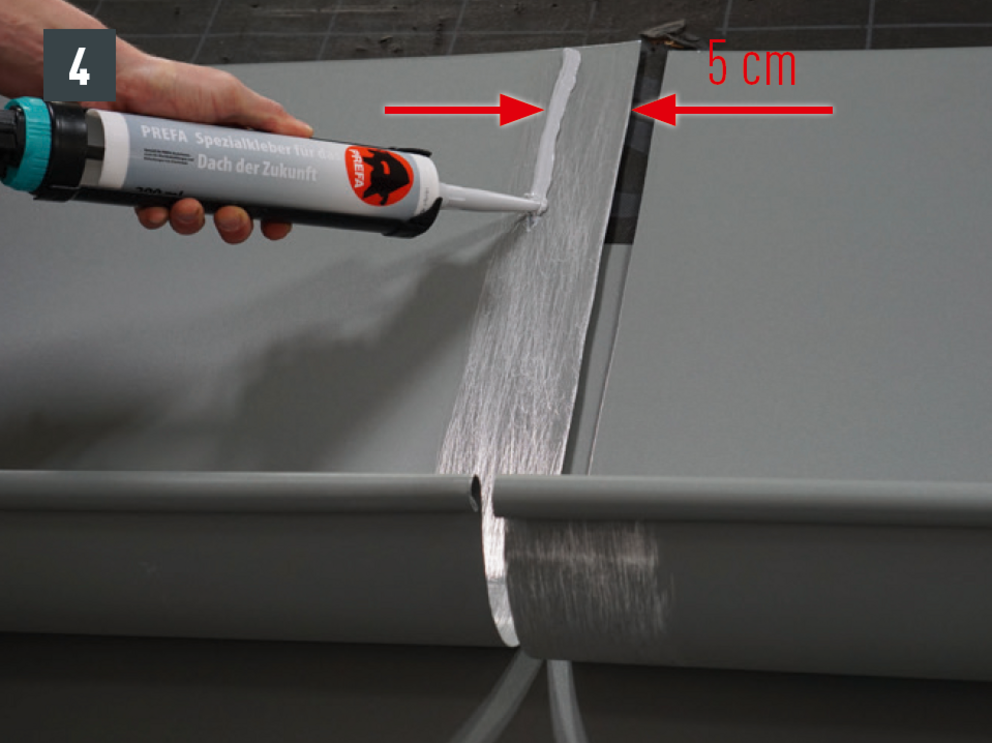
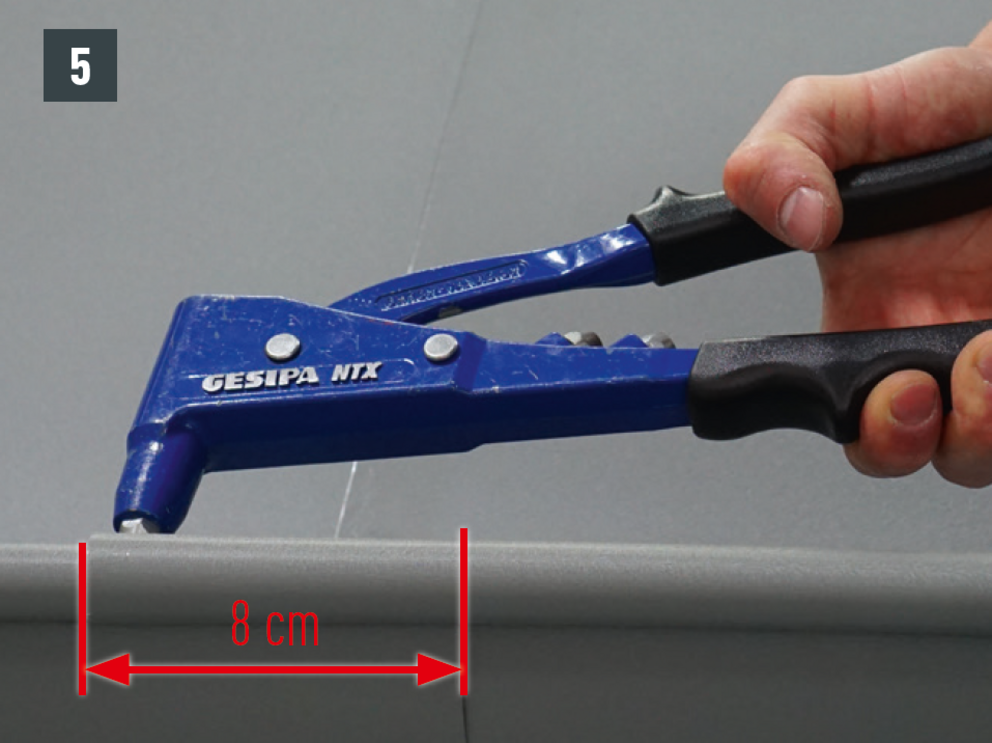
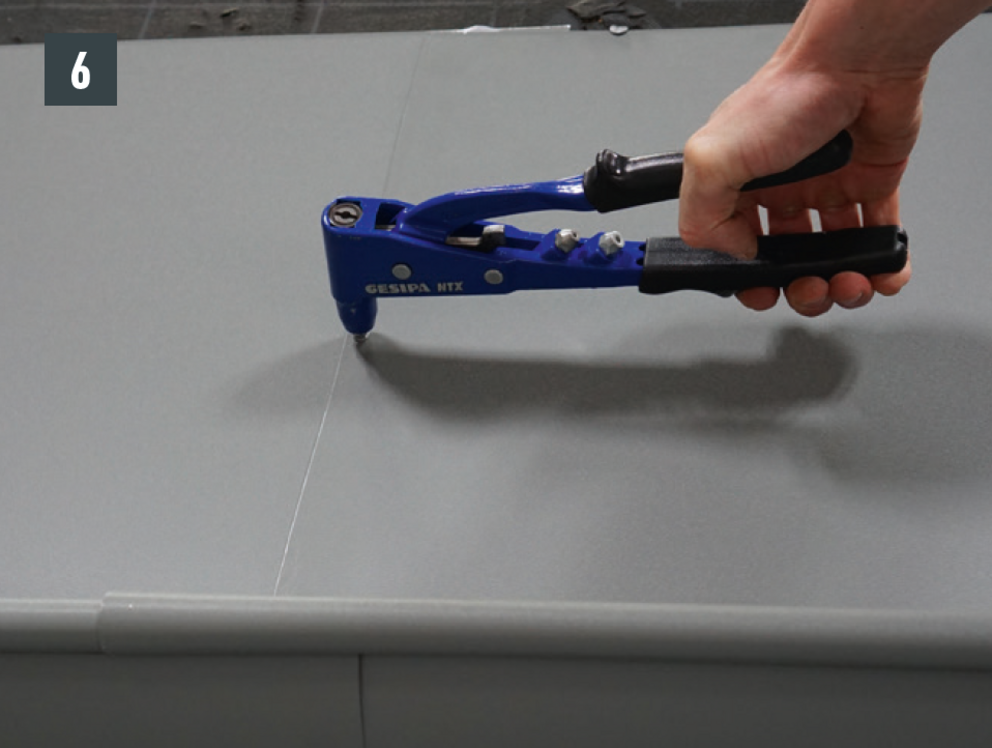
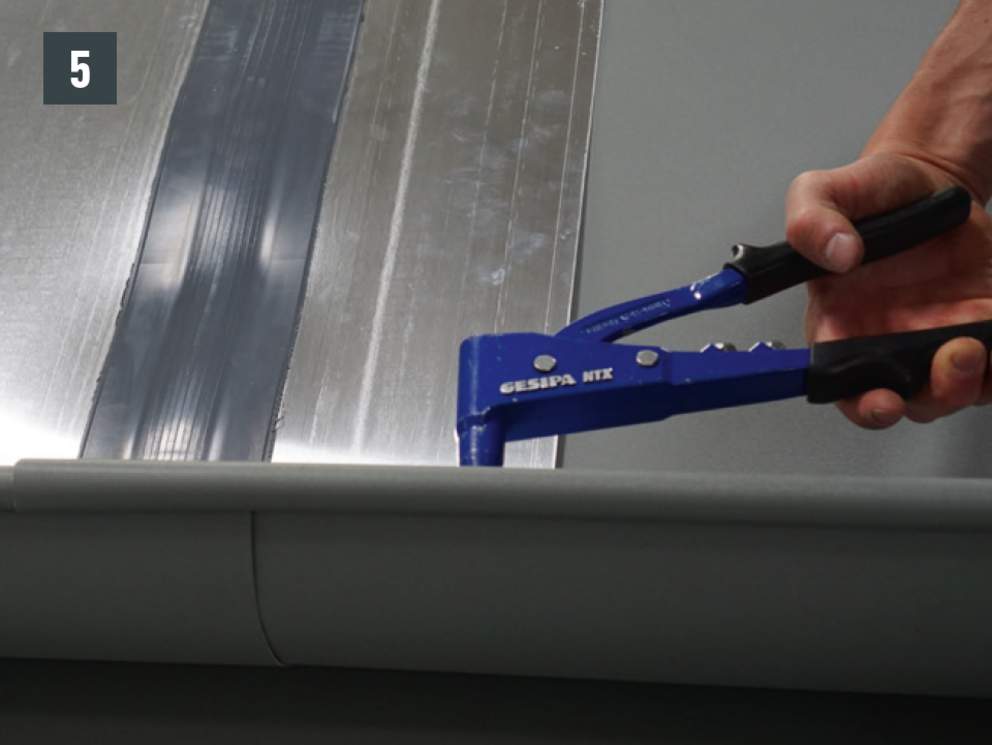
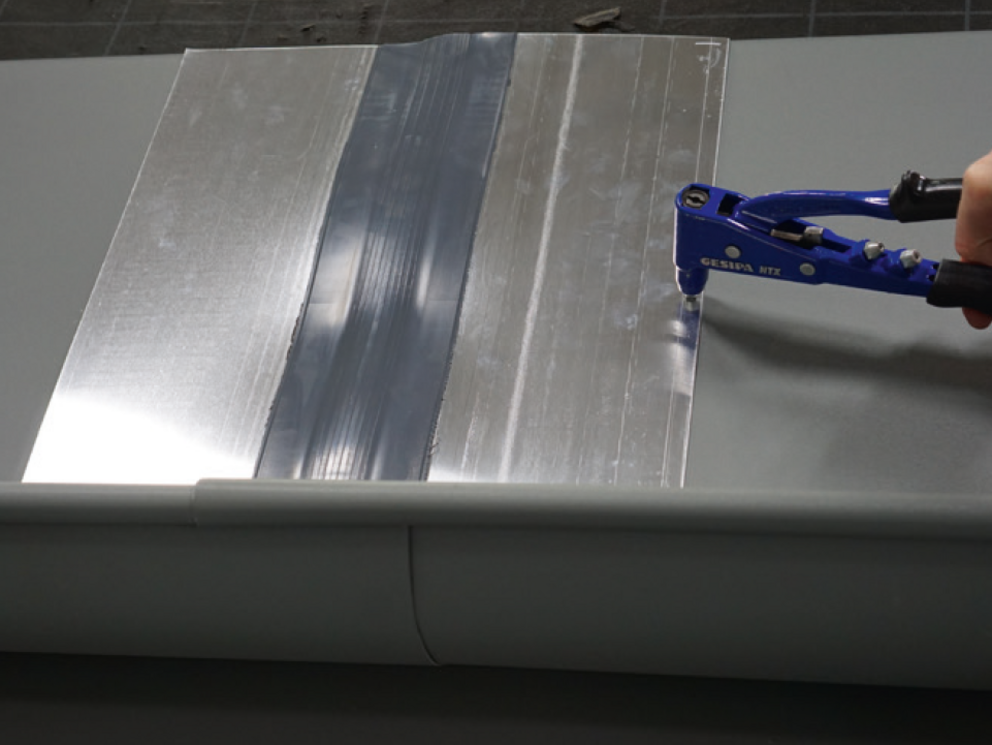
On-roof gutter joints can also executed with 20 pcs. of 4 x 9.5 mm PREFA rivets in a cross stitch version and sealed with PREFA silicone.
Note
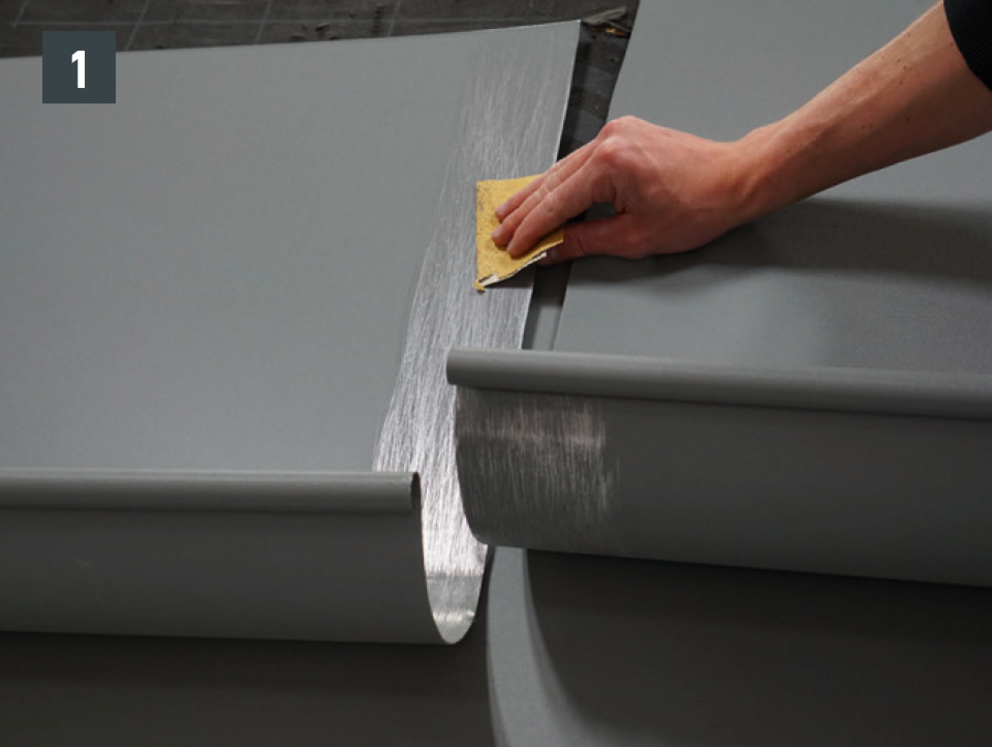
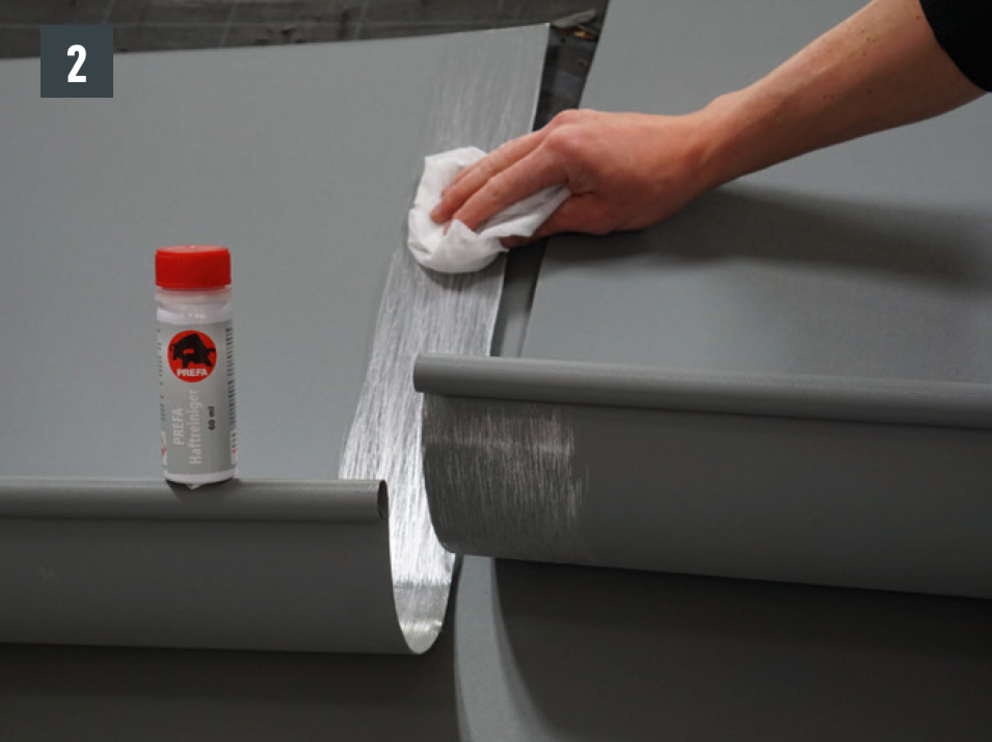
The joint can be made as a glued or riveted version. Riveted joints must also be sealed with PREFA special silicone.


You can only download content from one product category. If you require content from multiple categories, please create a separate download for each product area.
