Installation guidelines
Please select one or more chapters to download.
Table of contents

Replacing a roof tile

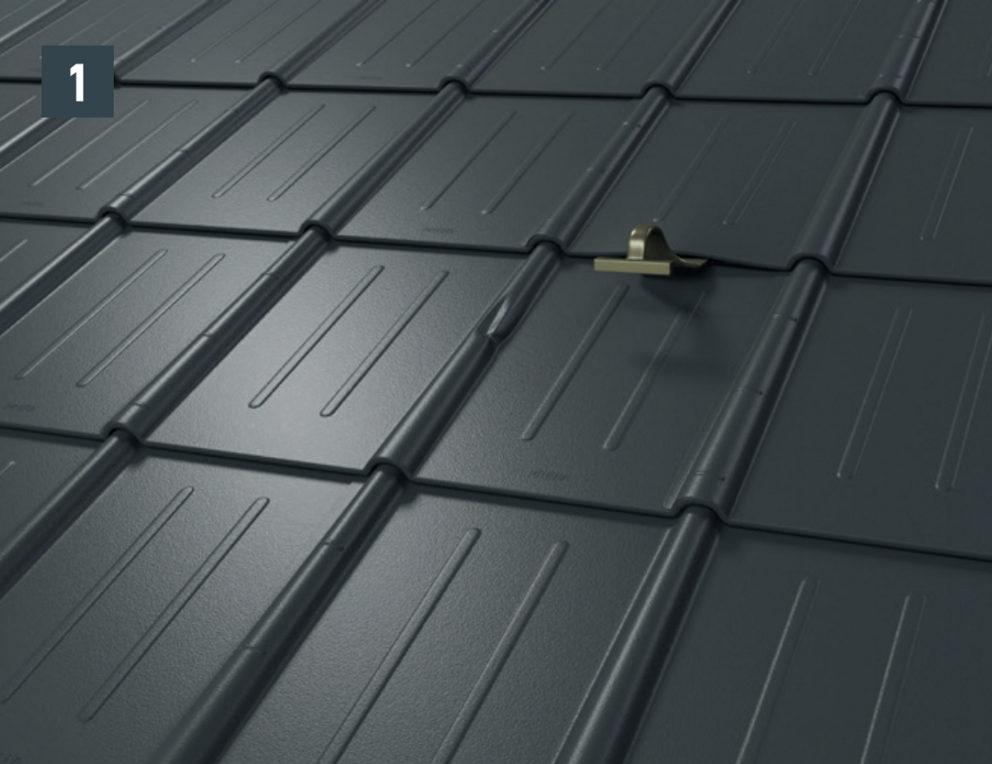
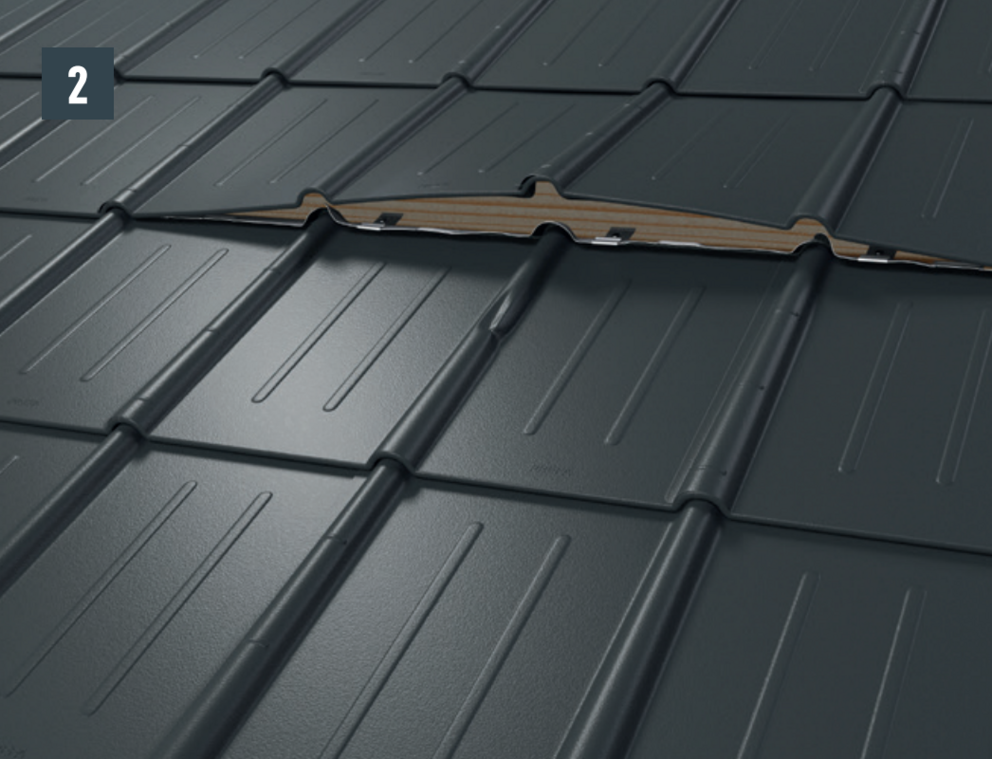
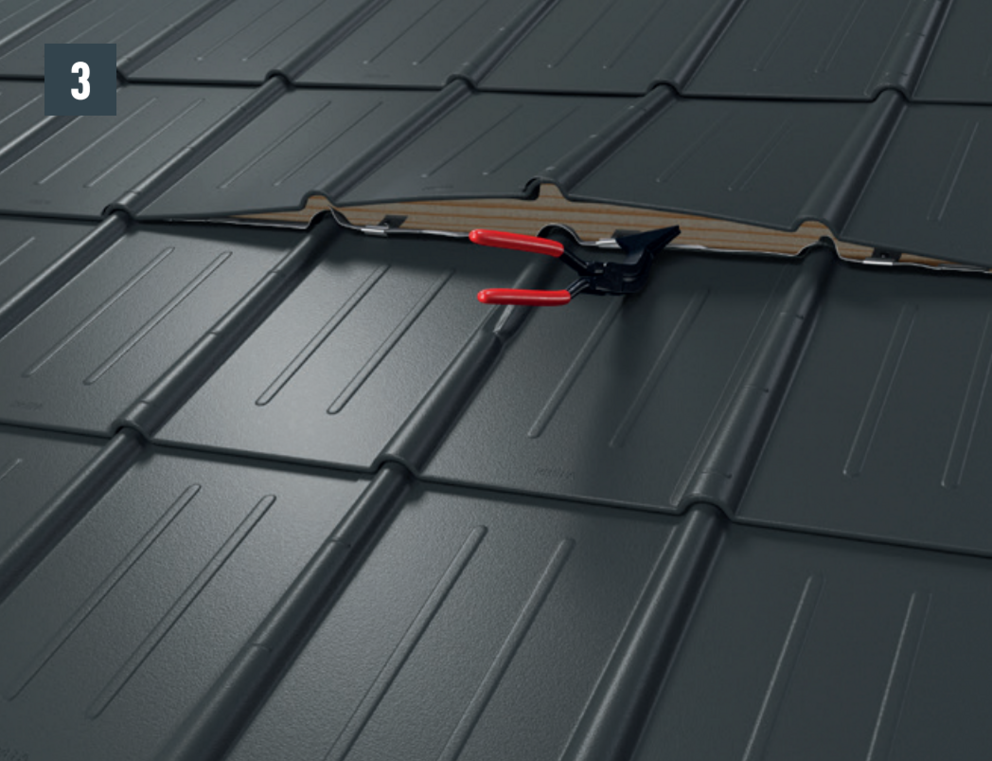
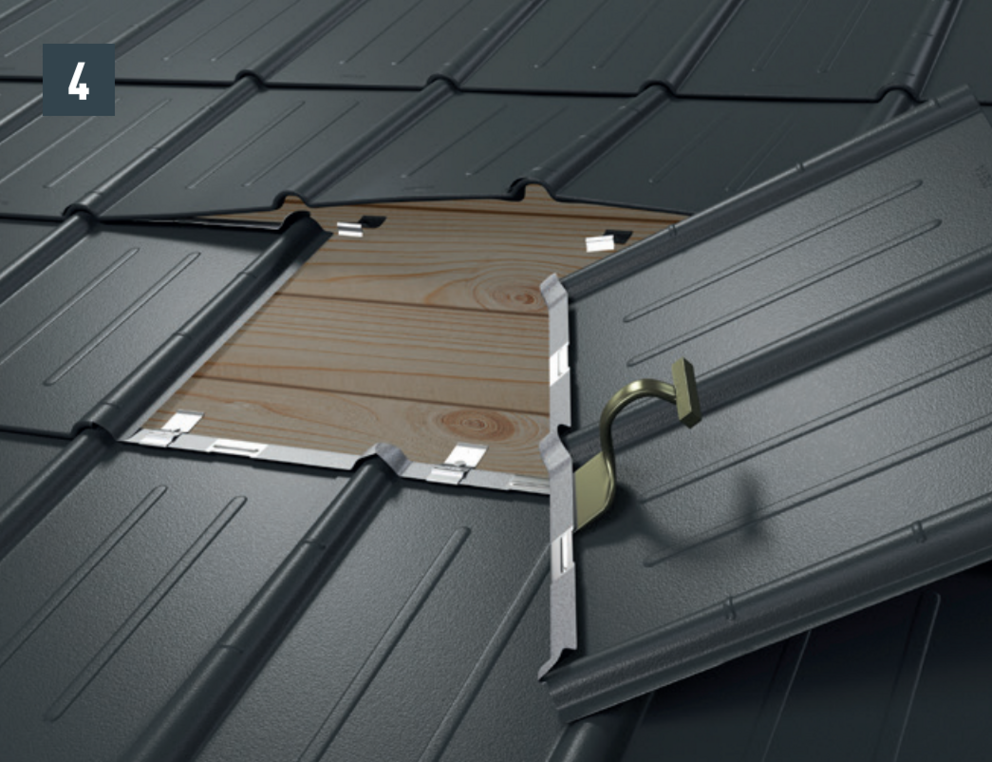
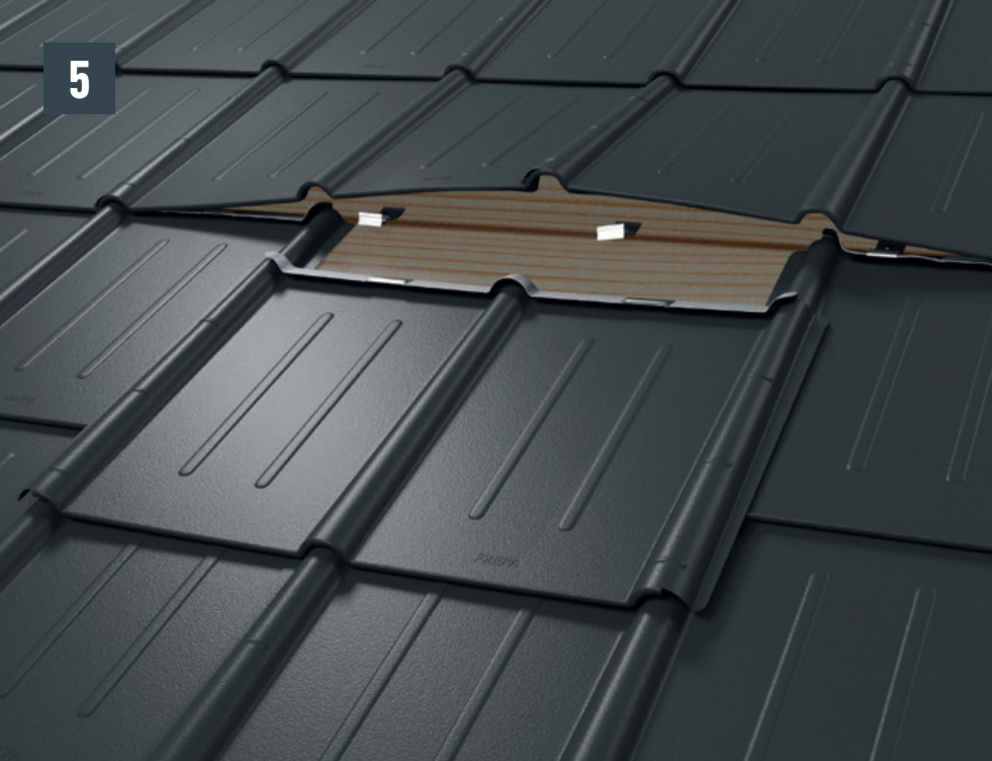
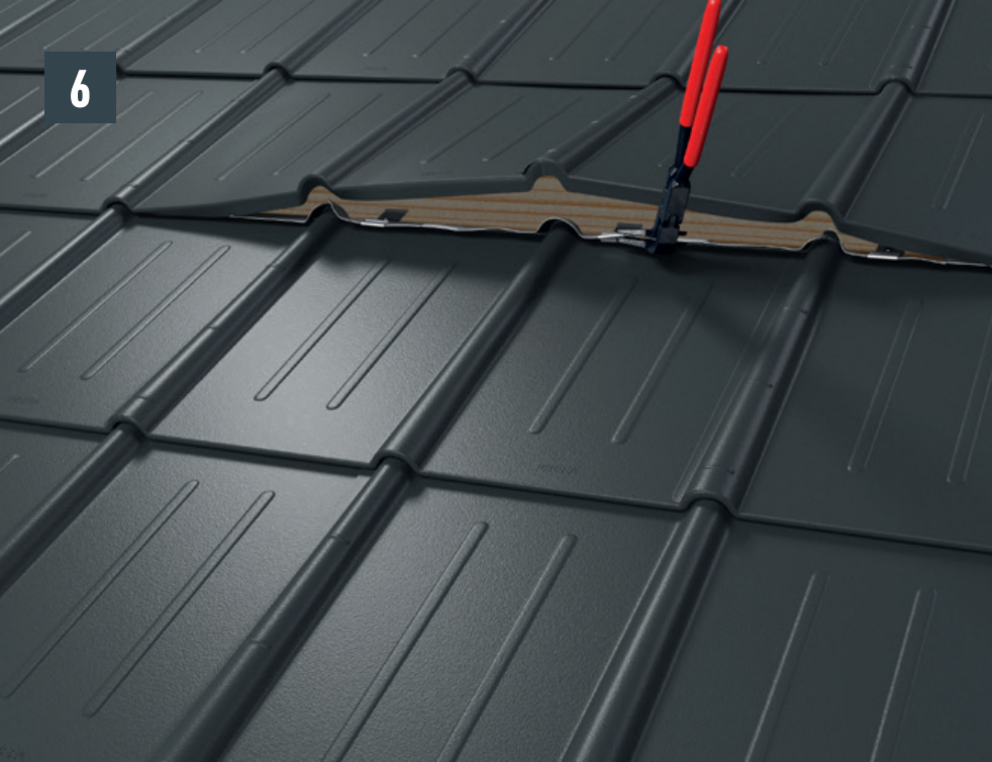
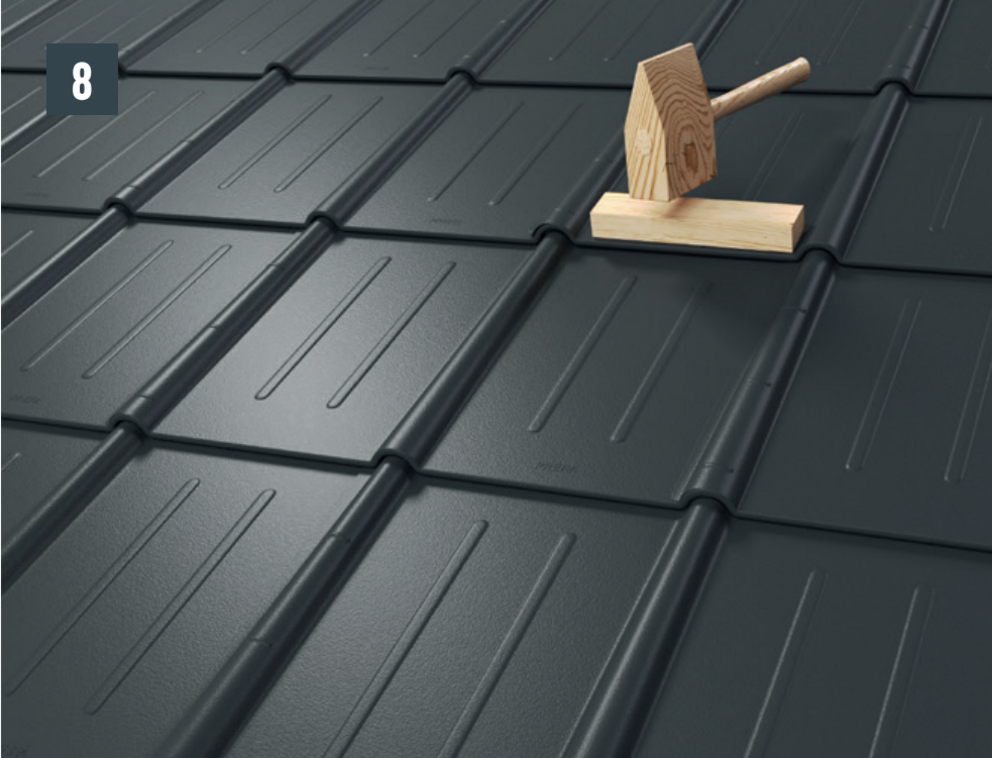
A professionally replaced roof tile should be recognisable as a repair. You will achieve a perfect result with the following work steps:

  • Lift up the upper transverse fold of the damaged roof tile with the shuttering iron (Image 1).
  • Manually remove the panel from the fold by giving it a sharp tug (Image 2).
  • Use the seaming pliers to open the two clamps on the seam and pull them down and out. Do not remove clips (Image 3).
  • Slightly open the top fold of the new panel so that the clip can be clipped on or the new panel can be folded in (Image 4).
  • Before pushing in the new roof tile, tension both outer grooves and open the upper fold slightly. The new tile can be covered with both lateral grooves over the others (Image 5).
  • Lift the fold and clamp both fasteners again. Bend the fold of the top panel downwards at an angle of approx. 90° (Image 6).
  • Gently press both folds together with the curved seaming pliers. Work on the top seam of the panel with a hammer and pliers (Image 7).
  • Carefully bring the fold between the grooves into the original one (Image 8).