 with PREFALZ in P.10 dark grey")


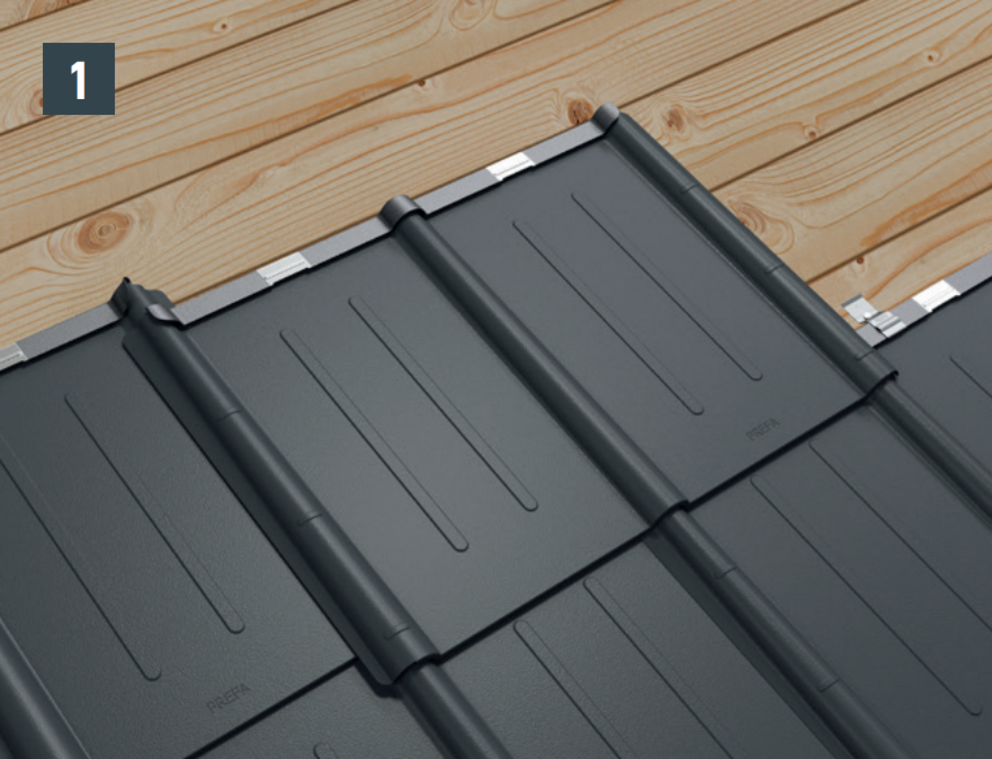
The roof tiles make laying in both directions possible. Roof tiles are always bonded, i.e. covered with offset joints. Half panels and frog mouth hatches can also be covered end to end (Image 1).
Cover roof tiles in horizontal rows.
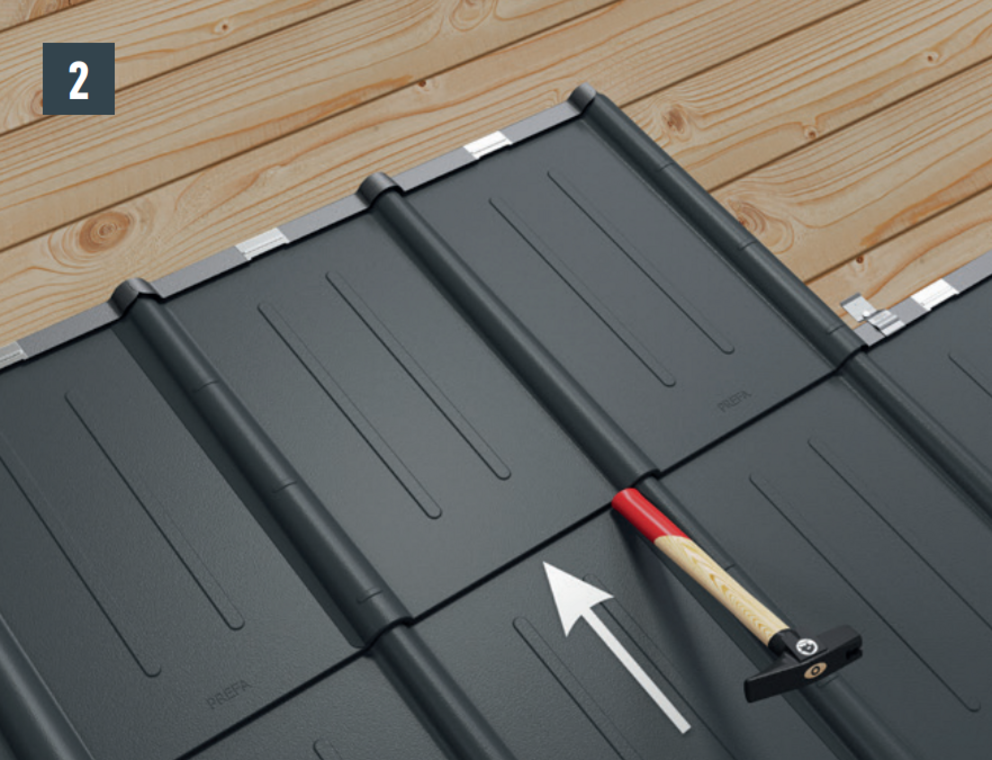
Press the panel into the hook fold. Strike the bottom edge of the panel lightly with the handle of the hammer (Image 2).
A general bracing of the overlapping grooves is not normally necessary. In the case of uneven surfaces, formwork and supporting systems (overlapping grooves are not in place), manual bracing may be necessary.
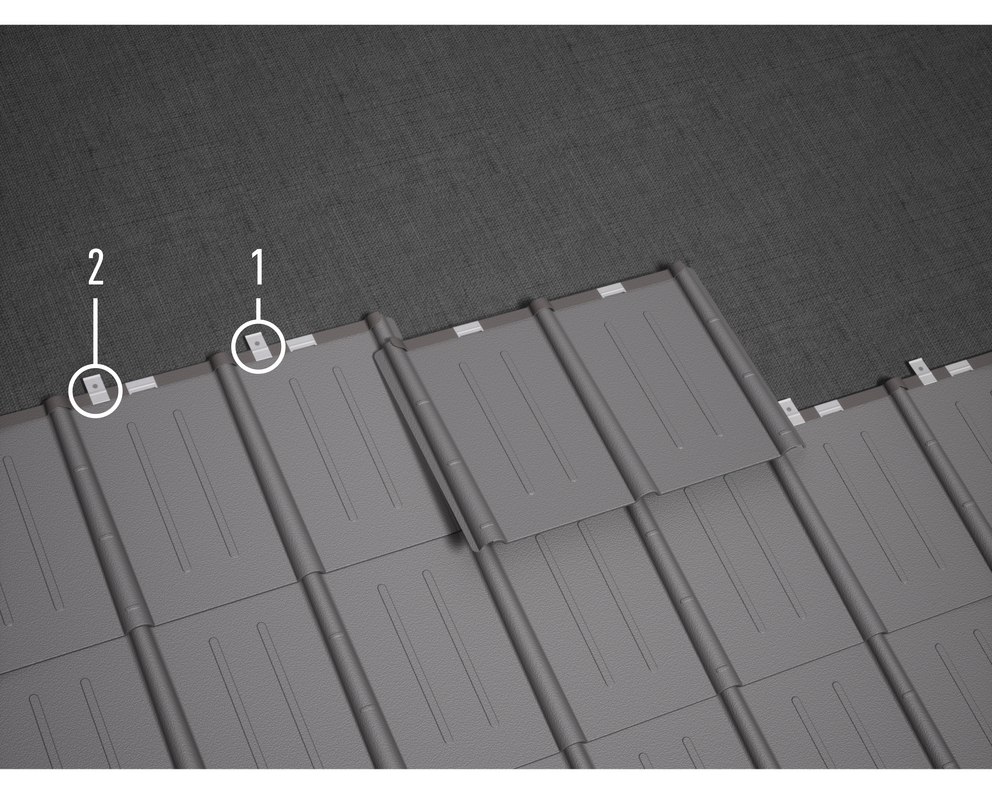
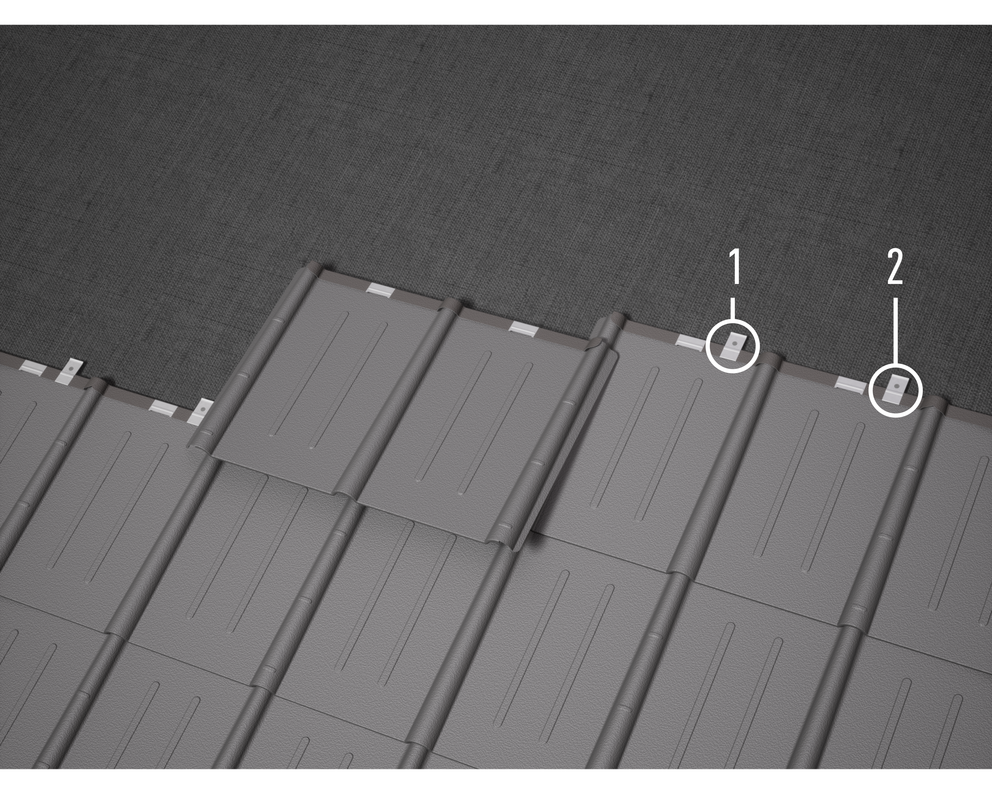
Fasten each panel with two patent fasteners (standard fastening). A fully boarded substrate is fastened with ring nails 2.8/25.
The clips must be set approx. 3 cm next to the panel groove. In areas particularly prone to storms, a wind load calculation is required and fastenings must be increased or decreased according to the calculation or screwed fastenings used instead of nailed ones. If the fastenings with an increased number of clips are not sufficient according to the calculation, an additional fastening can be attached to the side of the shaft outlet (underlying shaft) with 2 pcs. of SPAX screws per panel.
The clip arrangement depends on the covering direction. The patent clips are provided with an additional grain. This grain makes it easier to nail through if this is not possible with the given hole (e.g. because of a knothole, gap in the formwork).
You can only download content from one product category. If you require content from multiple categories, please create a separate download for each product area.
