 with PREFALZ in P.10 dark grey")


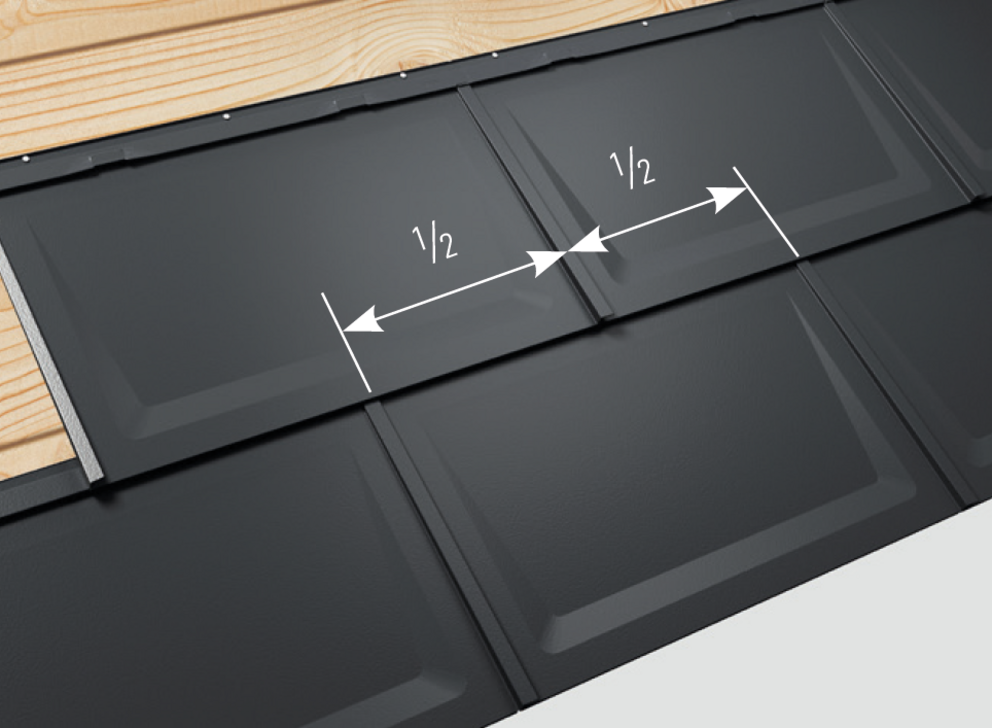
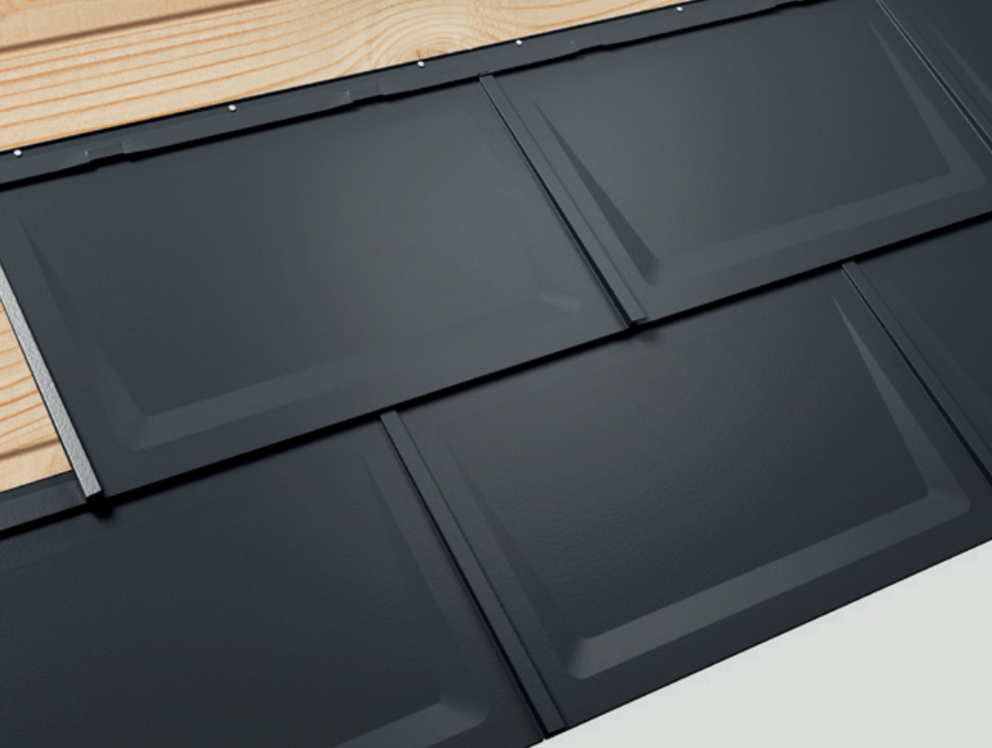
R.16 roof tiles are always bonded, i.e. covered with offset joints. In order to facilitate laying with half joint offset, a mark is to be made on the upper fold of the R.16 roof tile.
The R.16 roof tiles are laid from right to left and should be laid in rows (in horizontal rows).
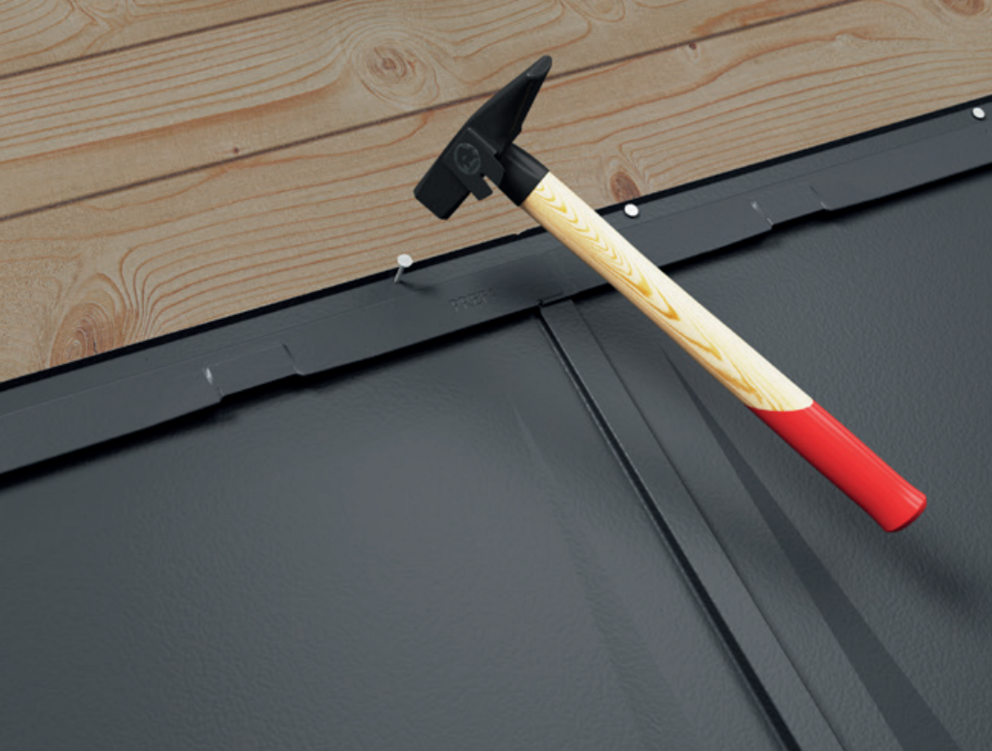
Adjust R.16 roof tile and push into the folds. Strike the bottom edge of the panel lightly with the handle of the hammer.
Align the R.16 roof panel on the lacing or the marking on the hem strips or the previous row.
Fasten the R.16 roof tiles with the supplied ring nails 2.8/25 (base attachment of 3 pcs. per R.16 roof tile).
In areas particularly prone to storms, a wind load calculation is required and fastenings must be increased or decreased according to the calculation.
Note
In the case of additional fastenings, the prepared grains can be used.
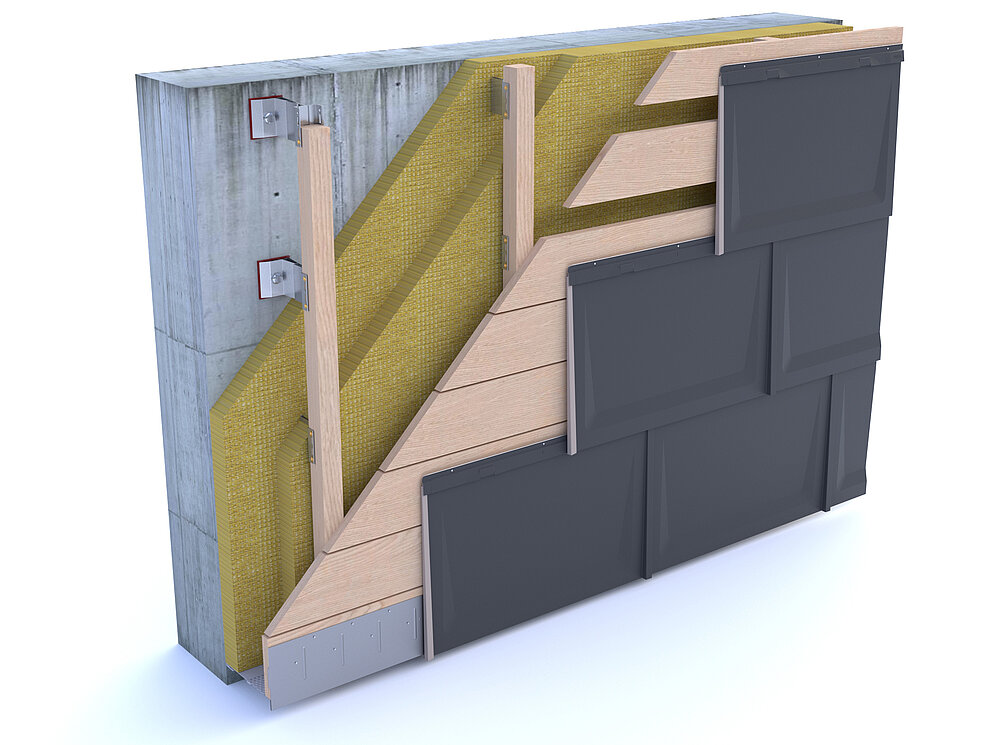
The solar roof panel on the façade can also be installed on skip sheathing (at least 24 mm). When installing on a open gap boarding a board must be placed under each fastening strip with a spacing of 420 mm to be achieved.
You can only download content from one product category. If you require content from multiple categories, please create a separate download for each product area.
