 with PREFALZ in P.10 dark grey")


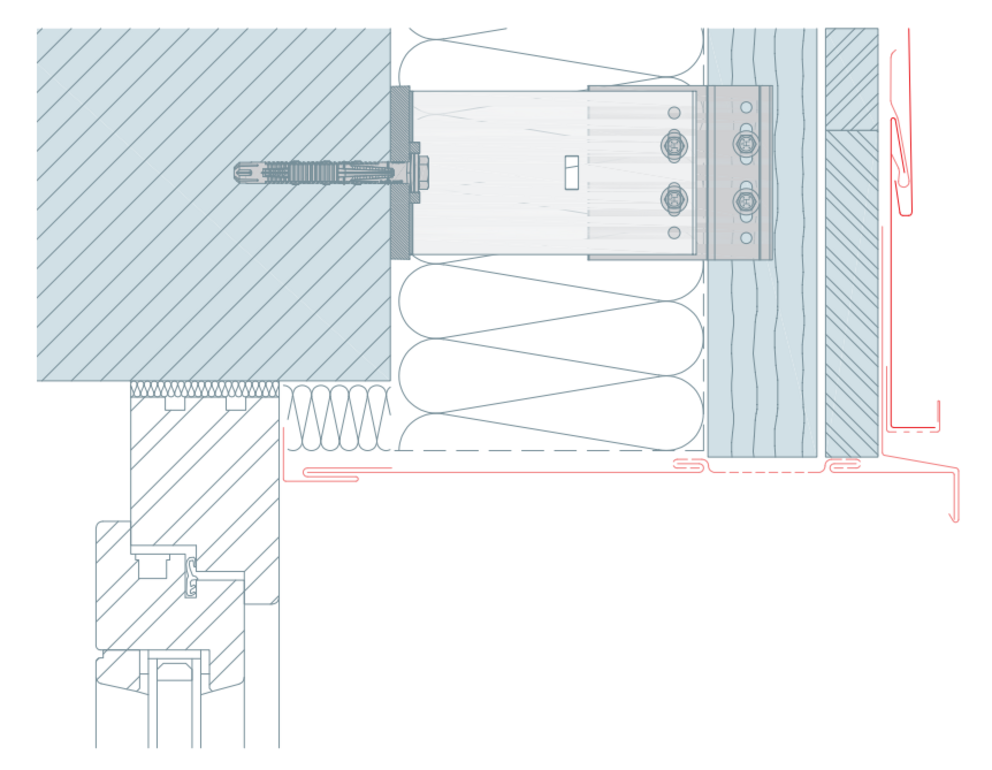
In the first step, a perforated flashing and a lining plate should be installed. please ensure an unobstructed airflow. Make sure that the air outlet of the ventilation cavity remains unobstructed.

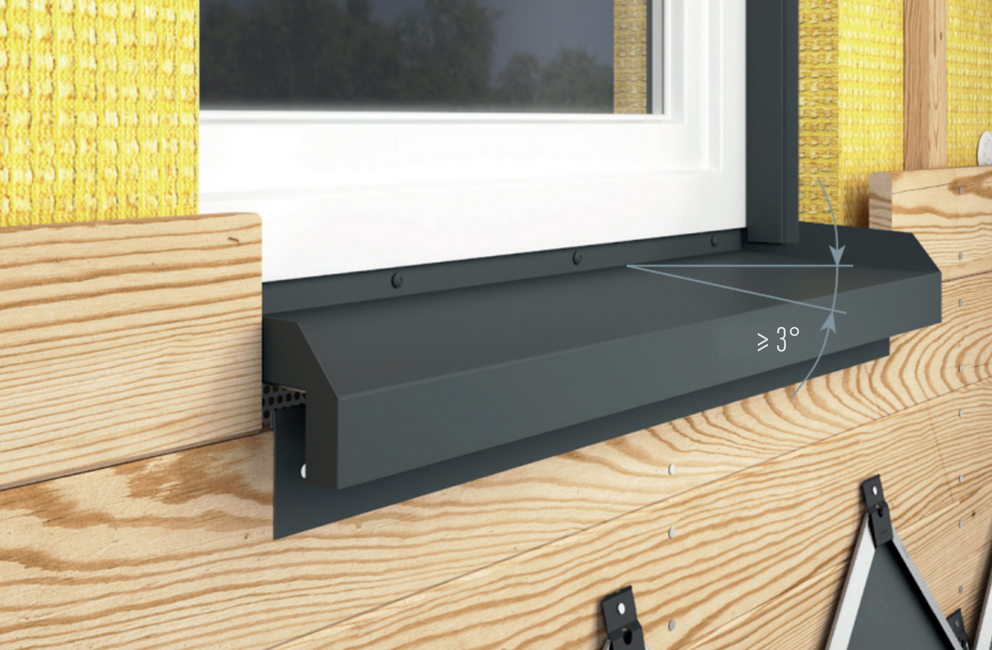
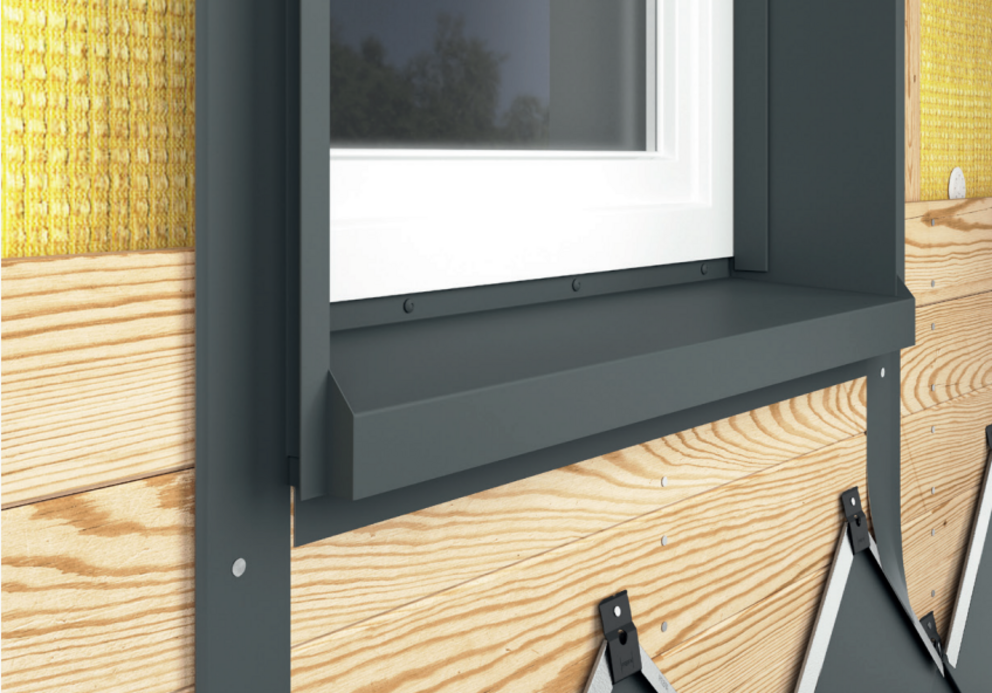
The windowsill can then be prepared to the required dimensions and installed in the window frame. The pocket trims are subsequently ready to install.

Note
When installing the windowsill in the window frame, ensure that it is imperveous to heavy rain. Also observe the guidelines of the window manufacturer.
Note
The windowsill must have a gradient of at least 3°. Observe the national requirements.
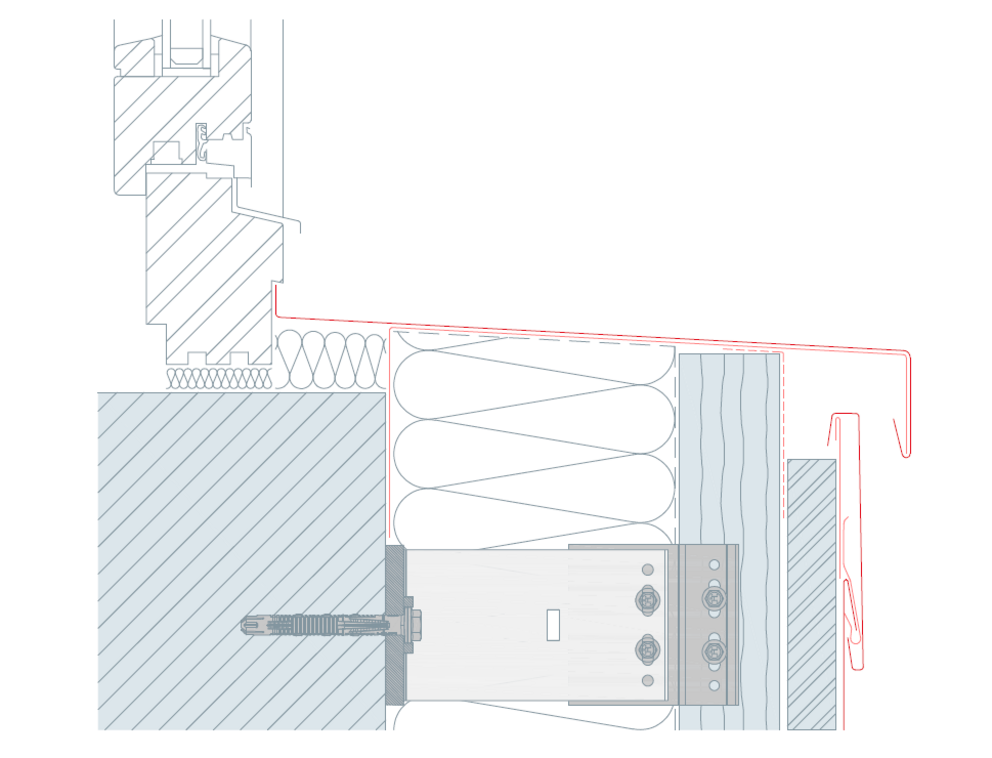
Then the fixing brackets for the soffit plate are screwed into the substructure on the left and right of the window. At the same time, the connector strips for the soffit plate and the connector strips for the window lintel are fastened to the window frame or brickwork.
Note
If necessary, extend the pocket profile to the next drainage level so that any water entering can be safely drained away.

Prepare jamb flashing to site requirements. The bottom of the jamb flashing must be notched to suit windowsill dimensions.

Prepare the top detail jamb and make a 90 degree termination for better stability.

Join the jamb flashing with the pocket profile and close the seam.

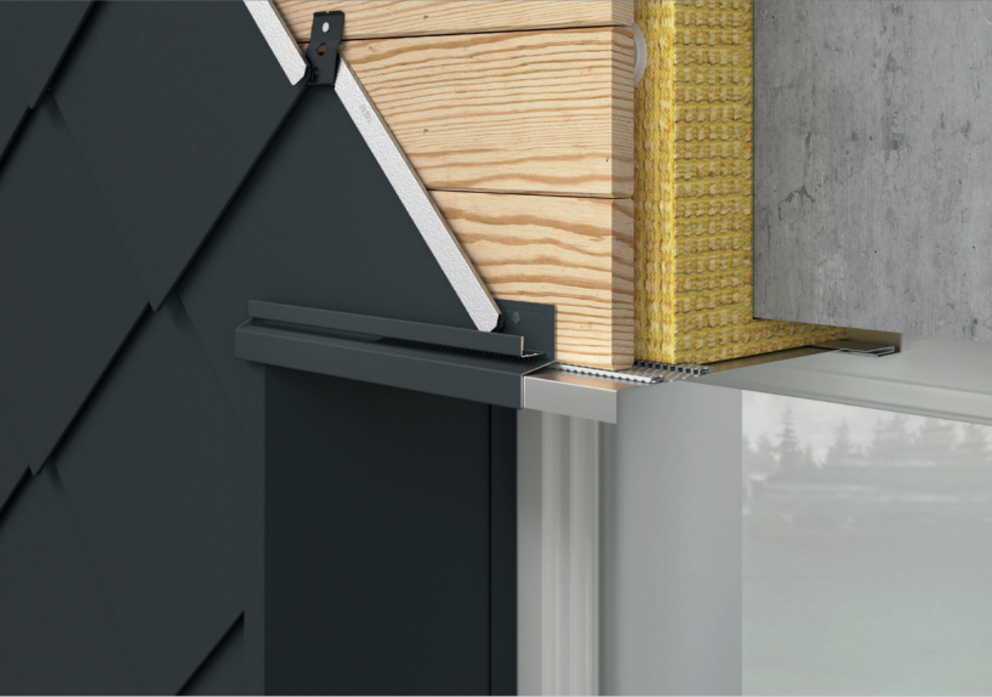
Next, the wind head detail can be prepared. Follow the images below to prepare a square stop end on both sides of the drip edge.

Prepare a head flashing according to existing dimensions and install it in conjunction with the drip edge. The rain guard is hung on the upper soffit plate.

Drip edge and perforated profile are both fixed to the supporting system. Use spacers to make it parallel.

If all sides of the window frame have been prepared, the installation of the small-format product can continue. Add an additional 20 mm when cutting out each part of the small-format product that overlaps the window frame. Then edge the additional 20 mm forwards. This ensures that the perforated starter profile fits securely.
You can only download content from one product category. If you require content from multiple categories, please create a separate download for each product area.
