 with PREFALZ in P.10 dark grey")


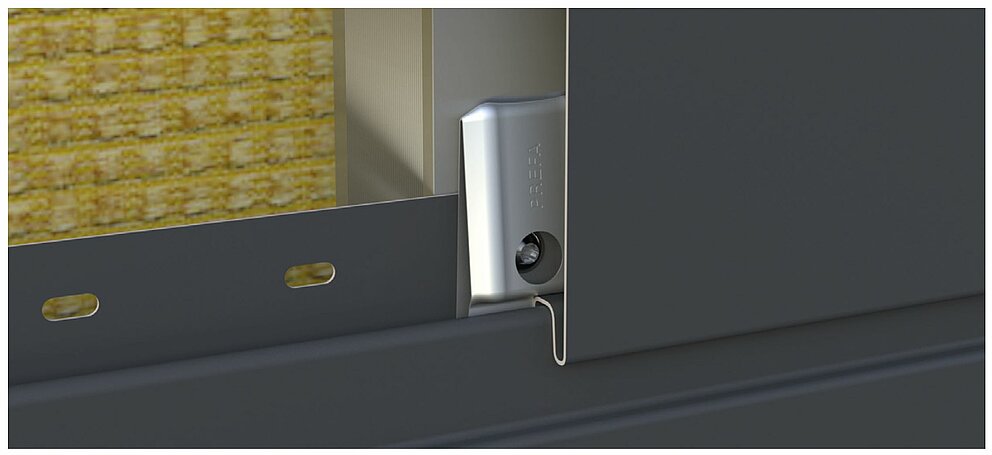
The spacing between the storm-proof clip and siding tongue is decisive for tension-free installation and material expansion. For this reason, install the storm-proof clip exclusive with the appropriate installation aid to ensure consistent spacing.
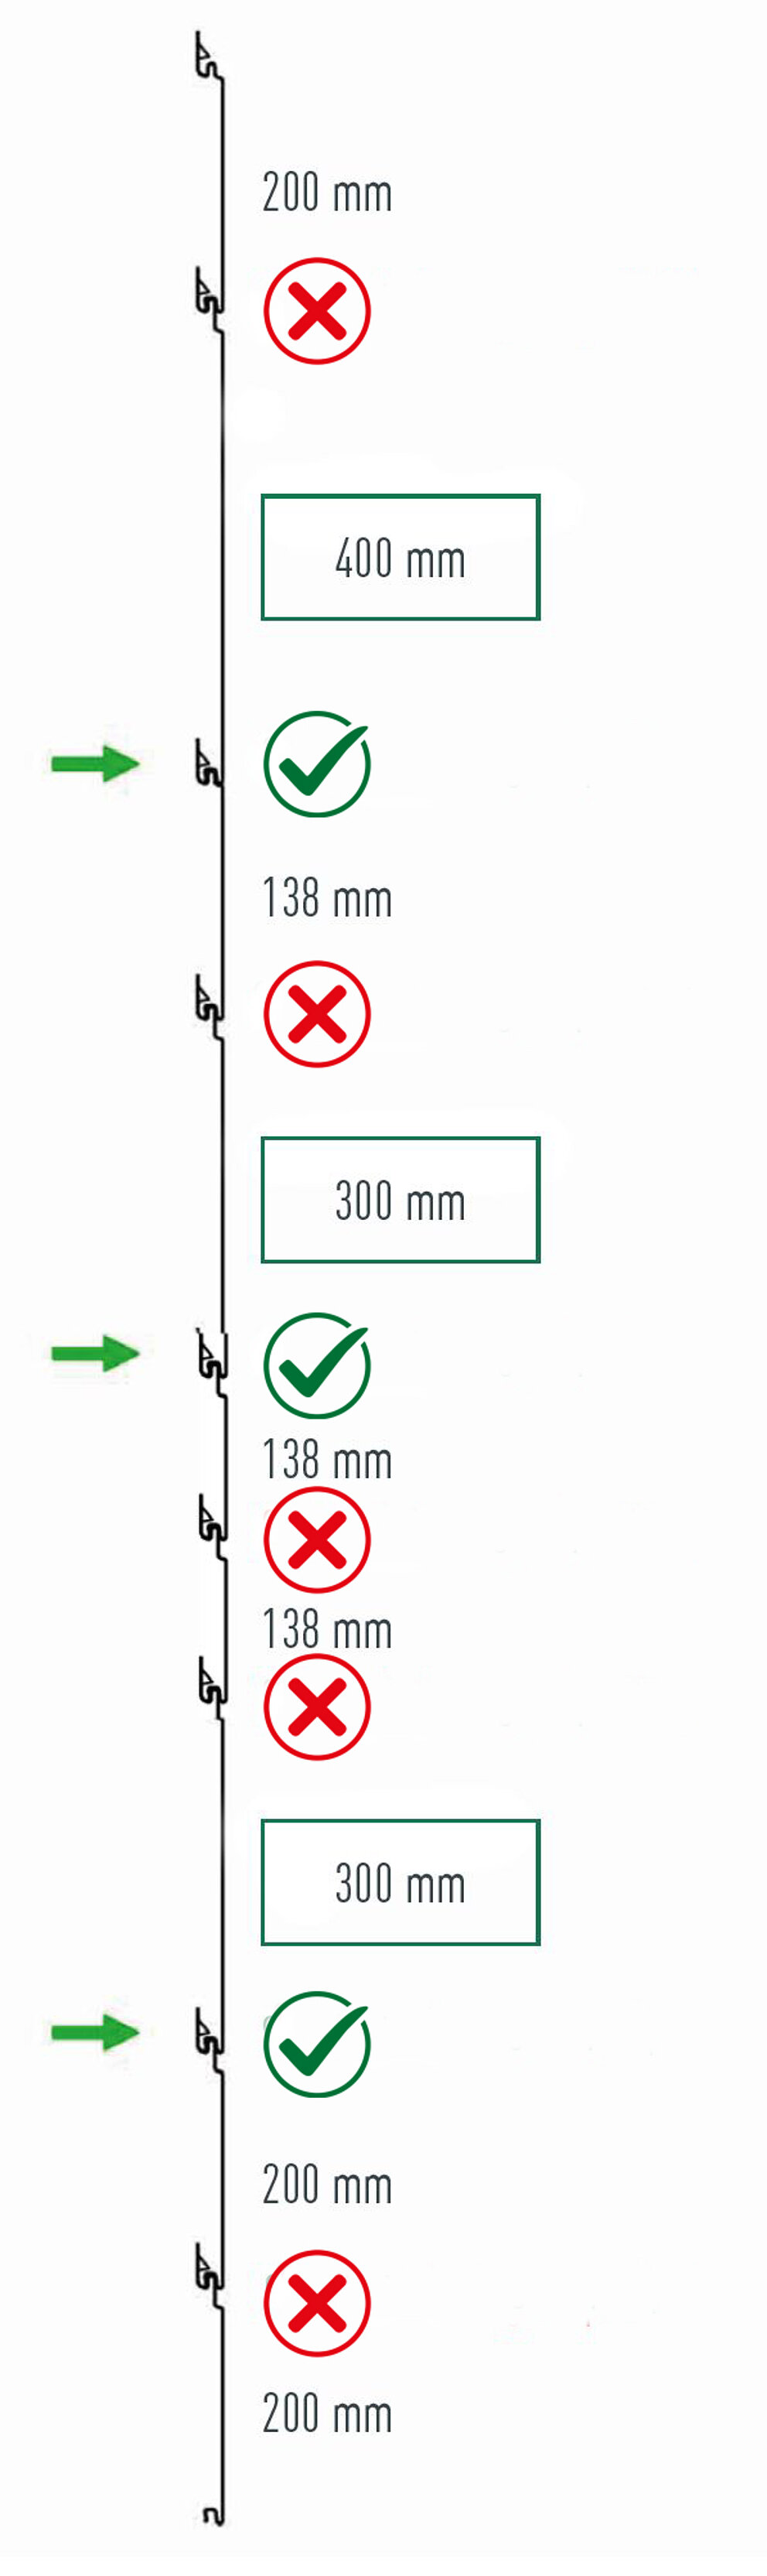
The storm-proof clip must be installed on all fastening points with the following combination of material thickness and width (each siding must be fastened on at least two substructure profiles).
Note
For perforated siding, the supporting sub-structure and the fastening strip, including storm-proof clips, are visible through the perforation.
Storm-proof clip installation aid for a material thickness of 1.0 mm |
Storm-proof clip installation aid for a material thickness of 1.2 mm |
For the installation of storm-proof clips in:
|
For the installation of storm-proof clips in:
|


Storm-proof clip installation aid for a material thickness of 1.5 mm |
For the installation of storm-proof clips in:
|

The storm-proof clip is screwed into the fastening strip (spring) and holds the overlapping siding in place:
Note
If you start off the façade with a 400 × 1.2 mm siding, for example, you must fasten the storm-proof clip to the starter profile.


You can only download content from one product category. If you require content from multiple categories, please create a separate download for each product area.
